No-Bake Mango Cheesecake
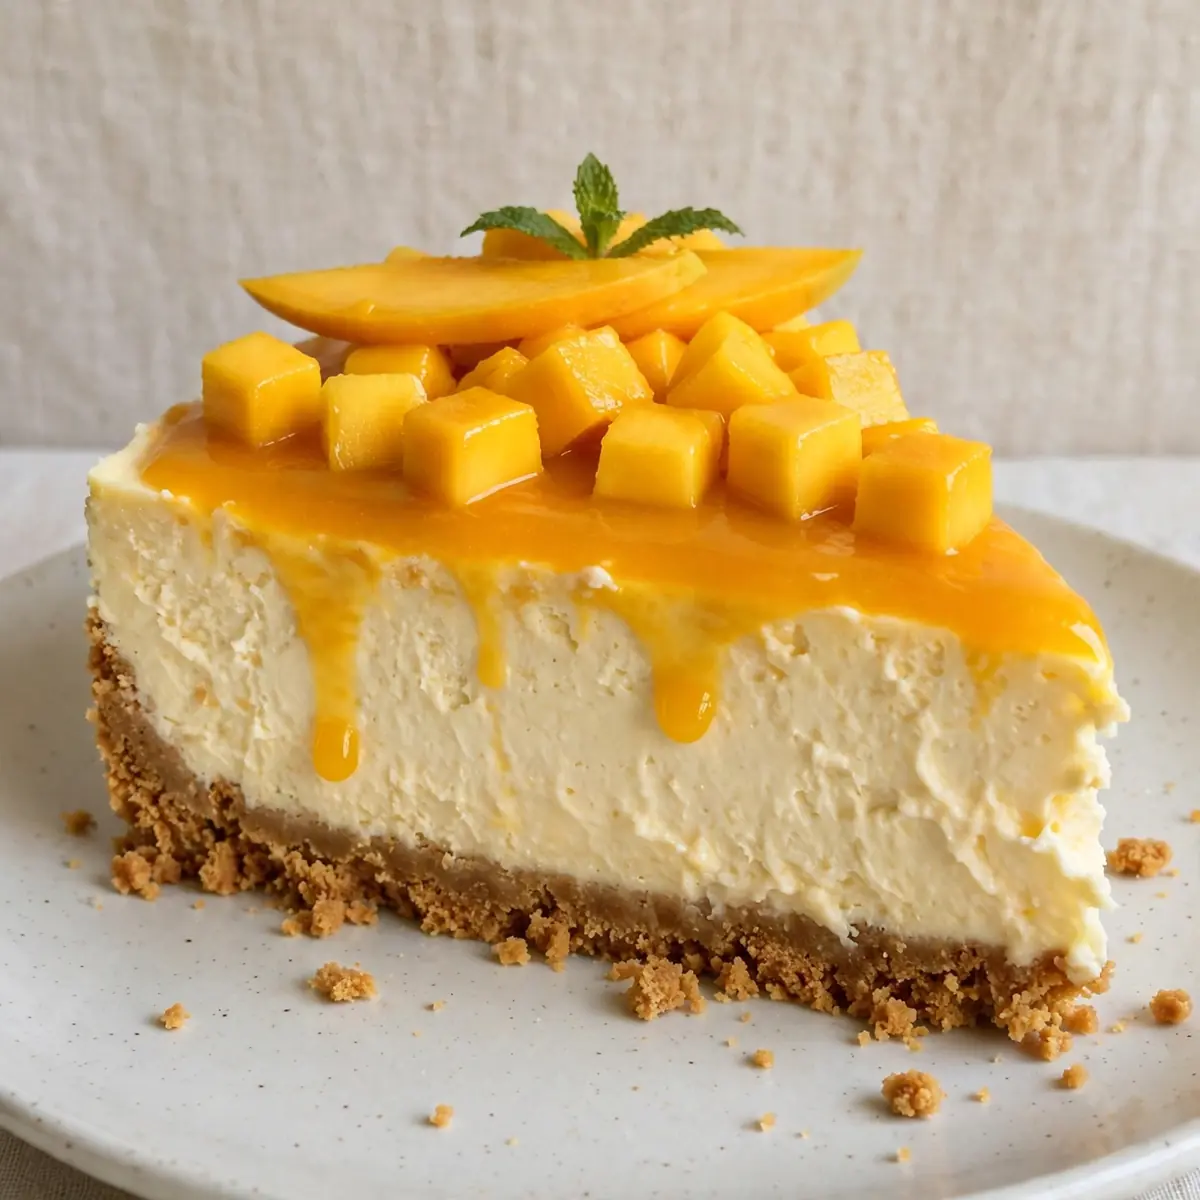
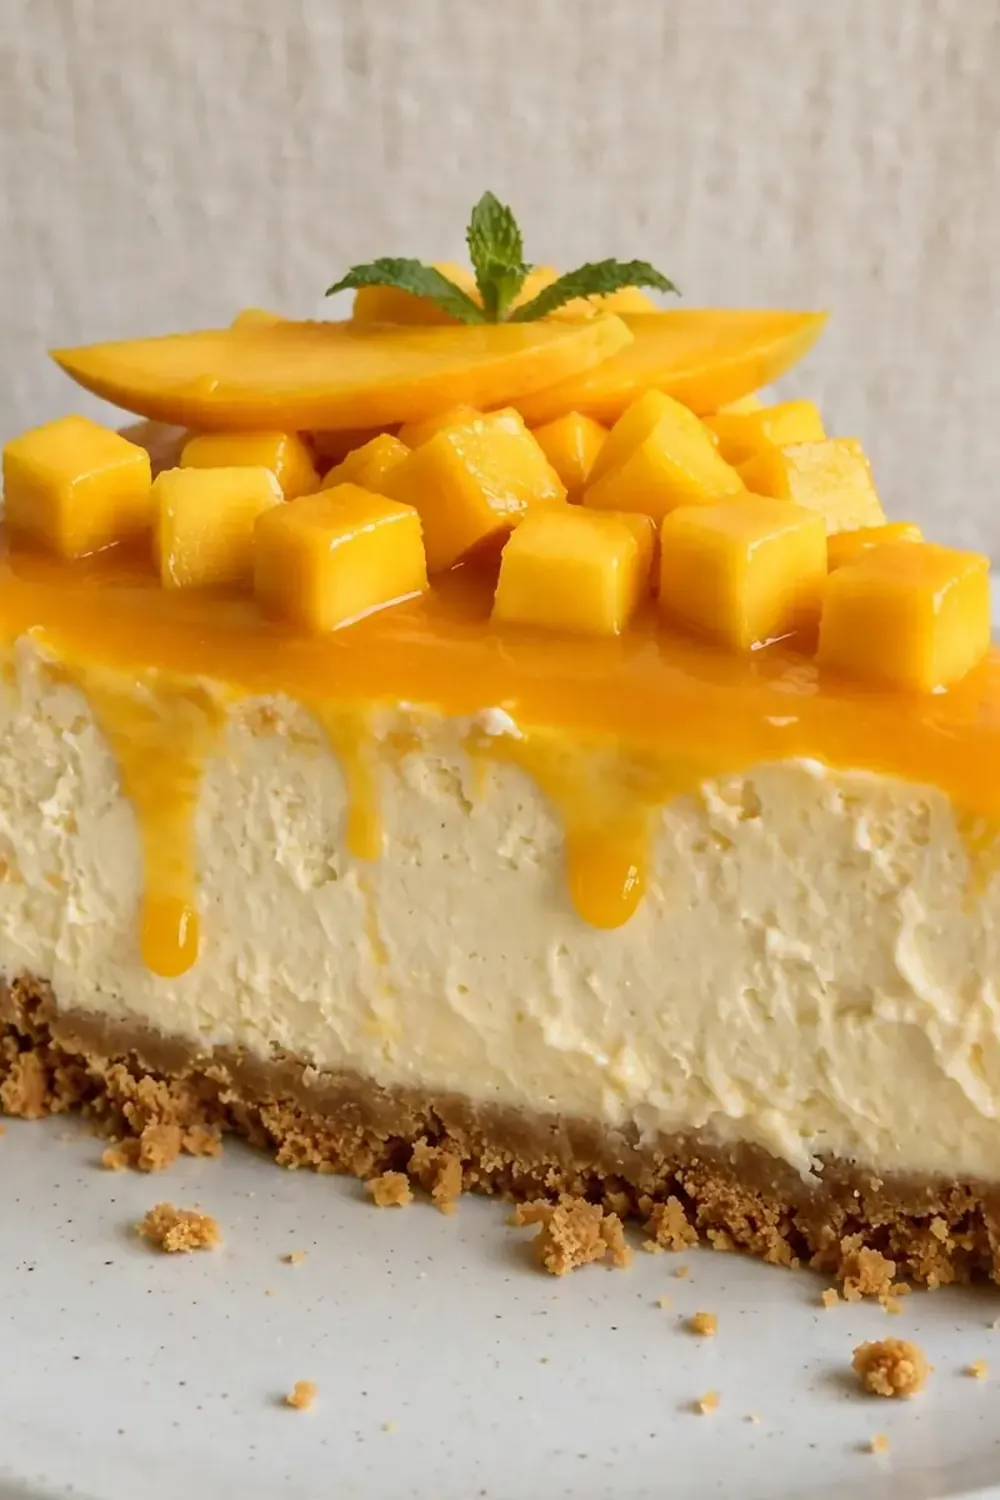
There’s a quiet magic in a dessert that looks as though it’s spent hours in a professional pastry kitchen but was, in truth, assembled in the quiet of your own home without the oven ever flickering on. This No-Bake Mango Cheesecake is that very trick; a glossy, golden showpiece that sits tall on the plate, its silky filling quivering slightly, topped with a slick of pure mango pulp that catches the light like stained glass. This is my go-to recipe when I need something quick but impressive, and I promise that with a few thoughtful touches, you’ll be serving slices that look as though they’ve come straight from a restaurant pass.
Recipe Overview
- Prep Time: 30 minutes
- Chill Time: 6 hours (or overnight)
- Total Time: 6 hours 30 minutes
- Servings: 10–12 generous slices
- Difficulty: Medium (simple steps, but requires patience for setting)
Why You’ll Love This No-Bake Mango Cheesecake
- Restaurant-Quality Presentation: The vibrant, unapologetic yellow of the mango topping against the creamy white filling makes for a plate that begs to be photographed.
- No Oven Required: Perfect for warm British summers or when you simply want to avoid heating up the kitchen, yet the result feels entirely sophisticated, much like a sip of Watermelon Mint Cooler.online/classic-chocolate-cream-pie/”>Classic Chocolate Cream Pie .online/moist-banana-cake-with-brown-butter-frosting/”>Moist Banana Cake With Brown Butter Frosting.online/watermelon-lemonade/”>Watermelon Lemonade.
- Make-Ahead Marvel: This cheesecake actually improves overnight, making it the ultimate stress-free dessert for entertaining.
- Buttery, Crunchy Base: The biscuit base is firm and holds its shape perfectly, providing a satisfying contrast to the luscious, velvety filling.
- Pure Mango Flavour: Using ripe, fragrant mangoes means the flavour is bright, natural, and utterly irresistible, without any synthetic aftertaste.
Ingredients You’ll Need
- 250g digestive biscuits (or Hobnobs for a richer flavour)
- 100g unsalted butter, melted
- 1 tablespoon caster sugar
- 500g full-fat cream cheese, at room temperature
- 100g icing sugar, sifted
- 1 teaspoon vanilla bean paste (or extract)
- 300ml double cream
- 2 large, very ripe mangoes (about 500g flesh)
- 2 tablespoons caster sugar (for the mango purée)
- Juice of 1 lime
- 4 teaspoons powdered gelatine
- 3 tablespoons cold water (for blooming gelatine)
- Edible flowers, such as pansies or violas, for garnish (optional, but stunning)
Tip: For the most vibrant colour and sweetest flavour, use Alphonso or Kent mangoes. They are less fibrous and produce a smoother, more luxurious purée.
How to Make No-Bake Mango Cheesecake
- Prepare the Base: Place the digestive biscuits into a sealed food bag and crush them with a rolling pin until they resemble fine, sandy crumbs. You want a uniform texture, with no large chunks remaining. Pour the crumbs into a bowl, add the melted butter and the tablespoon of caster sugar, and stir until the mixture feels like wet sand and clumps together when pressed. Tip this into a 20cm loose-bottomed cake tin lined with baking paper. Press the mixture down firmly and evenly using the back of a spoon. The base should feel compact and solid. Place it in the fridge to chill while you prepare the filling.
- Bloom the Gelatine: Sprinkle the 4 teaspoons of powdered gelatine over the 3 tablespoons of cold water in a small bowl. Do not stir. Let it sit for 5–10 minutes; the surface will wrinkle and the mixture will become a firm, wobbly sponge. This is called ‘blooming’ and is essential for a smooth, lump-free set.
- Make the Mango Purée: Peel the mangoes and slice the flesh away from the stone. Place the flesh into a blender or food processor with the 2 tablespoons of caster sugar and the lime juice. Blitz until completely smooth. You should have a thick, fragrant purée the colour of a sunset. Pour half of this purée into a small saucepan and set it aside for the topping. Reserve the other half in a jug for the cheesecake filling.
- Combine the Filling Base: In a large mixing bowl, beat the cream cheese with the sifted icing sugar and vanilla bean paste using an electric hand mixer. Beat until the mixture is completely smooth and creamy, with no lumps. The texture should be thick and glossy, and it should smell sweet and tangy.
- Whip the Cream: In a separate, clean bowl, whisk the double cream until it holds soft peaks. When you lift the whisk, the cream should form a gentle, floppy peak that folds over at the tip. Be careful not to overwhip it, or it will become grainy and buttery.
- Melt and Add the Gelatine: Gently melt the bloomed gelatine in the saucepan with the half-portion of mango purée reserved for the filling. Heat it on the lowest setting, stirring constantly, for about 1–2 minutes. You will see the gelatine dissolve completely, and the purée will become slightly thinner and very shiny. Do not let it boil. Remove from the heat and let it cool for 2 minutes. Then, pour this warm gelatine mixture into the cream cheese mixture, beating on low speed until fully incorporated. The mixture will look a little looser, but that is correct.
- Fold Everything Together: Gently fold the whipped cream into the cream cheese and mango mixture using a large metal spoon or a rubber spatula. Use a figure-of-eight motion, cutting through the centre and bringing the mixture from the bottom up. Fold until no white streaks remain. The final mixture should be thick, airy, and a uniform pale peach colour.
- Assemble and Set: Pour the filling onto the chilled biscuit base. Gently shake the tin to level the surface, or use the back of a spoon to smooth it. Tap the tin gently on the counter to release any air bubbles. The surface should be perfectly flat and smooth. Place the cheesecake in the refrigerator for at least 6 hours, or ideally overnight. The filling will feel set and slightly firm to the touch, with a gentle wobble.
- Finish with the Mango Topping: Once the cheesecake is fully set, pour the reserved mango purée over the top. Gently tilt the tin to spread it into an even, glossy layer that covers the entire surface. Return the cheesecake to the fridge for another 30 minutes to allow the topping to firm up slightly. The topping should be a brilliant, unbroken mirror of gold.
Tips From My Kitchen
- Temperature is Everything: Ensure your cream cheese is at room temperature before you begin. Cold cream cheese will create a lumpy, grainy filling that will never smooth out. Take it out of the fridge at least an hour before you start. Similarly, your double cream must be very cold for whipping; keep it in the fridge until the last moment.
- The Perfect Slice: For clean, restaurant-style slices, use a long, sharp knife. Dip the blade into a jug of very hot water, wipe it dry with a clean tea towel, then make your cut. Wipe the blade clean and reheat it between each slice. This melts through the cheesecake cleanly, preventing the filling from dragging or tearing.
- Release with Care: To remove the cheesecake from the tin without damaging the sides, run a hairdryer on a low, warm setting around the outside of the tin for 10–15 seconds. Alternatively, wrap a warm, damp tea towel around the tin. This gently loosens the sides without melting the cheesecake. Then, carefully push up the base.
- Bloom Your Gelatine Properly: Never skip the blooming step. Adding dry gelatine directly to a cold liquid will result in a clumpy, stringy mess. The bloomed gelatine must be melted gently into a warm liquid to disperse evenly. If your gelatine mixture has any undissolved granules after melting, strain it through a fine-mesh sieve before adding it to the filling.
- Presentation is a Performance: The small touches matter immensely. Before serving, wipe the base of the cheesecake with a damp cloth to remove any crumbs. Place the cheesecake on a large, white plate or a wooden board. Add a few edible flowers, a tiny pinch of flaky sea salt on the mango topping (it heightens the sweetness), and a drizzle of cold double cream around the base of the slice. Friends always ask me for this recipe after trying it at dinner parties, and these little flourishes are why.
Common Mistakes to Avoid
- Overcrowding the pan: Do not be tempted to use a smaller tin to make a taller cheesecake. A 20cm tin is the ideal diameter. A smaller tin will cause the filling to be too deep, which can lead to an uneven set and a longer chilling time. The ratio of base to filling is also critical for a balanced bite.
- Wrong temperature: The most common failure is a runny cheesecake. This almost always happens because the cream cheese was too cold, or the gelatine mixture was added to a very cold mixture, causing it to seize and form lumps rather than disperse evenly. Always ensure your cream cheese is at room temperature and that your whipped cream is folded in gently but thoroughly.
- Skipping the rest time: Patience is not optional here. Rushing the chilling process will result in a soft, sloppy cheesecake that will not hold its shape when sliced. The full 6-hour set is the minimum; overnight is far superior. The texture needs time to become firm, silky, and sliceable.
Delicious Variations to Try
- Spicy Version: Add a finely chopped, deseeded red chilli to the mango purée for the topping, along with a pinch of cayenne pepper. The gentle heat against the cool, creamy cheesecake is a wonderful, unexpected contrast that feels very modern.
- Vegan Option: Substitute the cream cheese with a high-quality cashew-based cream cheese, the double cream with full-fat coconut cream (chilled overnight and whipped), and use agar-agar instead of gelatine. Follow the packet instructions for the agar-agar, as it sets differently from gelatine.
- Different Fruit: This method works beautifully with other stone fruits. Try a passion fruit topping for a sharp, tangy contrast, or a smooth, blitzed raspberry coulis for a deep, jewel-like red. The technique remains the same.
What to Serve With No-Bake Mango Cheesecake
- A light, crisp Rose Lemonade Mocktail to cut through the richness.
- A small spoonful of extra-thick double cream, poured around the slice.
- A scattering of fresh mint leaves and finely chopped pistachios for colour and crunch.
Still hungry for ideas? You might also love Decadent Churro Cheesecake Donut Cookies To Bake, No Bake Strawberry Cheesecake Pots from our sister kitchens.
Frequently Asked Questions
No-Bake Mango Cheesecake
Ingredients
Method
-
Prepare the Base: Place the digestive biscuits into a sealed food bag and crush them with a rolling pin until they resemble fine, sandy crumbs. You want a uniform texture, with no large chunks remaining. Pour the crumbs into a bowl, add the melted butter and the tablespoon of caster sugar, and stir until the mixture feels like wet sand and clumps together when pressed. Tip this into a 20cm loose-bottomed cake tin lined with baking paper. Press the mixture down firmly and evenly using the back of a spoon. The base should feel compact and solid. Place it in the fridge to chill while you prepare the filling.
-
Bloom the Gelatine: Sprinkle the 4 teaspoons of powdered gelatine over the 3 tablespoons of cold water in a small bowl. Do not stir. Let it sit for 5–10 minutes; the surface will wrinkle and the mixture will become a firm, wobbly sponge. This is called ‘blooming’ and is essential for a smooth, lump-free set.
-
Make the Mango Purée: Peel the mangoes and slice the flesh away from the stone. Place the flesh into a blender or food processor with the 2 tablespoons of caster sugar and the lime juice. Blitz until completely smooth. You should have a thick, fragrant purée the colour of a sunset. Pour half of this purée into a small saucepan and set it aside for the topping. Reserve the other half in a jug for the cheesecake filling.
-
Combine the Filling Base: In a large mixing bowl, beat the cream cheese with the sifted icing sugar and vanilla bean paste using an electric hand mixer. Beat until the mixture is completely smooth and creamy, with no lumps. The texture should be thick and glossy, and it should smell sweet and tangy.
-
Whip the Cream: In a separate, clean bowl, whisk the double cream until it holds soft peaks. When you lift the whisk, the cream should form a gentle, floppy peak that folds over at the tip. Be careful not to overwhip it, or it will become grainy and buttery.
-
Melt and Add the Gelatine: Gently melt the bloomed gelatine in the saucepan with the half-portion of mango purée reserved for the filling. Heat it on the lowest setting, stirring constantly, for about 1–2 minutes. You will see the gelatine dissolve completely, and the purée will become slightly thinner and very shiny. Do not let it boil. Remove from the heat and let it cool for 2 minutes. Then, pour this warm gelatine mixture into the cream cheese mixture, beating on low speed until fully incorporated. The mixture will look a little looser, but that is correct.
-
Fold Everything Together: Gently fold the whipped cream into the cream cheese and mango mixture using a large metal spoon or a rubber spatula. Use a figure-of-eight motion, cutting through the centre and bringing the mixture from the bottom up. Fold until no white streaks remain. The final mixture should be thick, airy, and a uniform pale peach colour.
-
Assemble and Set: Pour the filling onto the chilled biscuit base. Gently shake the tin to level the surface, or use the back of a spoon to smooth it. Tap the tin gently on the counter to release any air bubbles. The surface should be perfectly flat and smooth. Place the cheesecake in the refrigerator for at least 6 hours, or ideally overnight. The filling will feel set and slightly firm to the touch, with a gentle wobble.
-
Finish with the Mango Topping: Once the cheesecake is fully set, pour the reserved mango purée over the top. Gently tilt the tin to spread it into an even, glossy layer that covers the entire surface. Return the cheesecake to the fridge for another 30 minutes to allow the topping to firm up slightly. The topping should be a brilliant, unbroken mirror of gold.
Notes
There is a deep satisfaction in lifting that first perfect slice from the tin, the mango topping glistening, the base holding firm, the filling a perfect, creamy quiver. This No-Bake Mango Cheesecake is not just a dessert; it is a statement. It tells your guests that you care about the details, that you understand the power of a beautiful plate, and that you have a few quiet tricks up your sleeve. I would love to know how you get on with it. Do you add a little extra lime zest? Have you tried it with a different fruit? Drop a comment below and share your own little touches. For more stunning, no-bake creations, do explore the other recipes from Med over at Sweettable.Online.