Chewy Funfetti Cookies
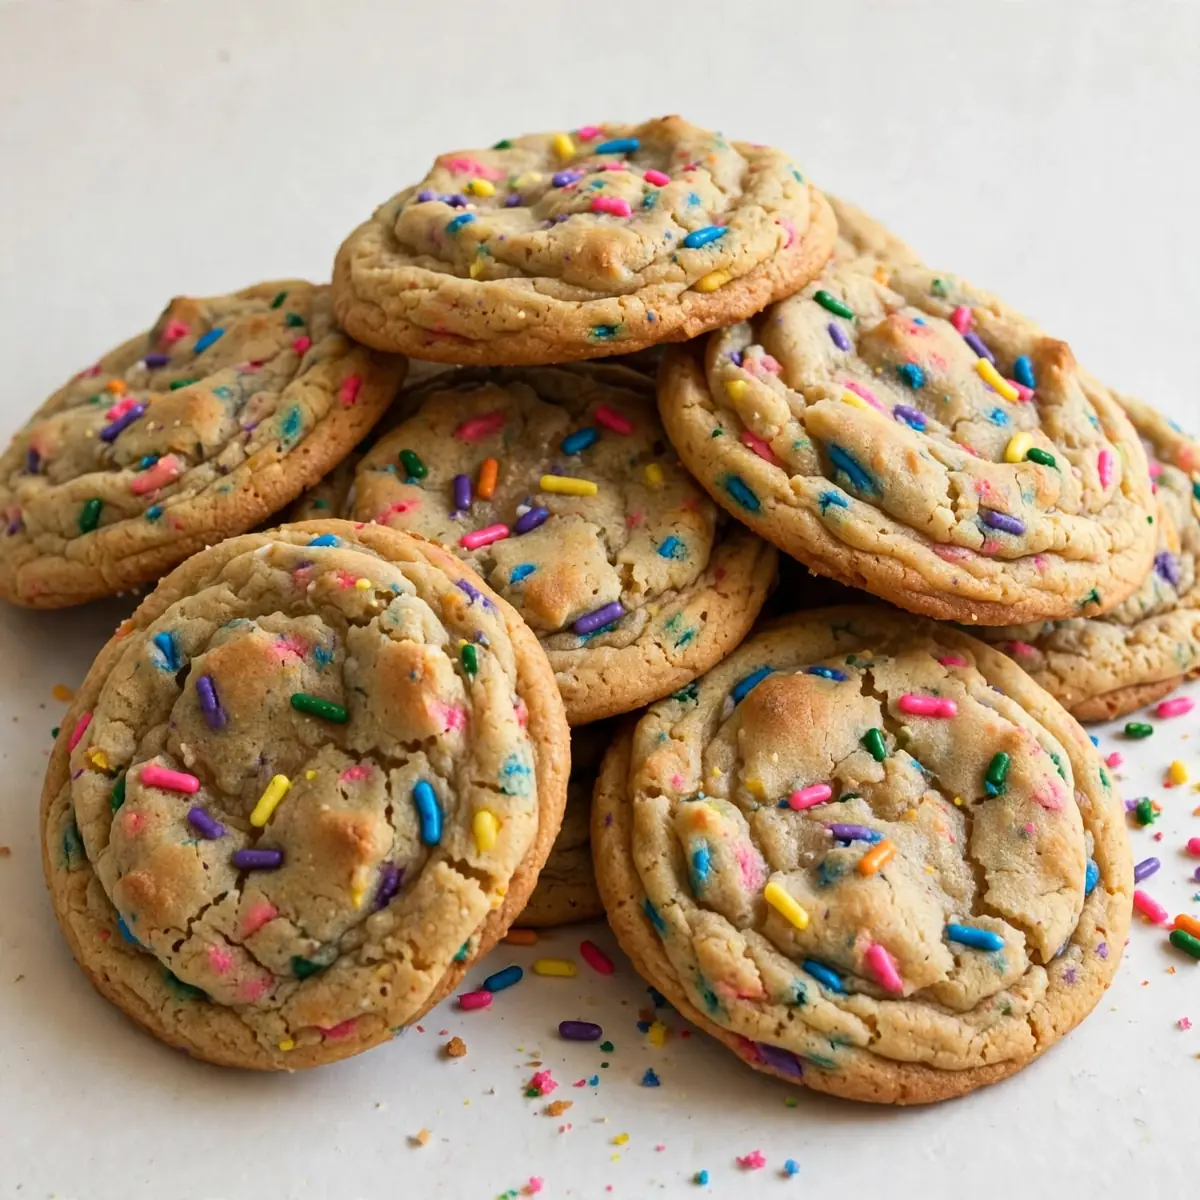
I remember the first time I served these Chewy Funfetti Cookies at a dinner party; a friend actually asked if I’d had them flown in from a boutique bakery in London. The secret, of course, was that they came from my own oven, and the real magic wasn’t just the taste—it was the way they looked on the plate. This recipe turns a childhood classic into a showstopping finale, where every sprinkle catches the light and the texture rivals that of a fine patisserie.
Recipe Overview
- Prep Time: 20 minutes
- Cook Time: 12 minutes
- Total Time: 32 minutes
- Servings: 18 cookies
- Difficulty: Easy
Why You’ll Love This Chewy Funfetti Cookies
- Restaurant-Quality Plating: These cookies are designed to be served with intention—tall, domed, and studded with vibrant spots of colour that make any dessert board look curated.
- That Unforgettable Texture: The edges offer a delicate, buttery crispness while the centres remain dense, soft, and almost fudgy—a textural contrast that feels luxurious.
- Effortless Showmanship: With a few simple garnishes, like a dusting of icing sugar or a dollop of clotted cream, you transform a humble biscuit into a memorable course.
- Consistent Results: I make this at least once a week – it’s become a family favourite. The method is foolproof; every batch yields that same perfect chew, time after time.
- Customisable Elegance: The base is a blank canvas. You can pair it with anything from a dark chocolate ganache to a fresh berry compote, or even a Rose Lemonade Mocktail, allowing you to tailor the dessert to the season or your menu.
Ingredients You’ll Need
- 225g unsalted butter, softened to room temperature
- 200g caster sugar
- 100g light brown sugar, packed
- 2 large eggs, at room temperature
- 2 teaspoons vanilla extract
- 360g plain flour
- 1 teaspoon bicarbonate of soda
- ½ teaspoon fine sea salt
- 120g rainbow sprinkles (jimmies-style, not nonpareils)
- 100g white chocolate chips (optional, for added richness)
Tip: For the most vibrant colour distribution, fold the sprinkles in by hand at the very end. Using a mixer at this stage can break the sprinkles and bleed their colour into the dough, creating a greyish hue instead of bright, distinct dots.
How to Make Chewy Funfetti Cookies
- Cream the Butter and Sugars: In a large bowl, beat the softened butter, caster sugar, and brown sugar together on medium speed for 3–4 minutes. You are looking for a pale, fluffy mixture that feels light and looks noticeably airy—the sound will shift from a heavy slap to a soft, smooth whisper.
- Add the Eggs and Vanilla: Beat in the eggs one at a time, ensuring each is fully incorporated before adding the next. The mixture will look glossy and slightly looser. Stir in the vanilla extract until the batter smells fragrant and sweet.
- Whisk the Dry Ingredients: In a separate bowl, whisk together the plain flour, bicarbonate of soda, and sea salt. This ensures the raising agent is evenly distributed—you don’t want a pocket of soda creating a metallic taste in one single cookie.
- Combine Wet and Dry: Gradually add the dry ingredients to the wet mixture, mixing on low speed. Stop just as the last streaks of flour disappear. The dough will be thick, sticky, and almost play-dough-like in consistency. Do not overmix; you should see no dry patches, but the dough should still feel soft and pliable.
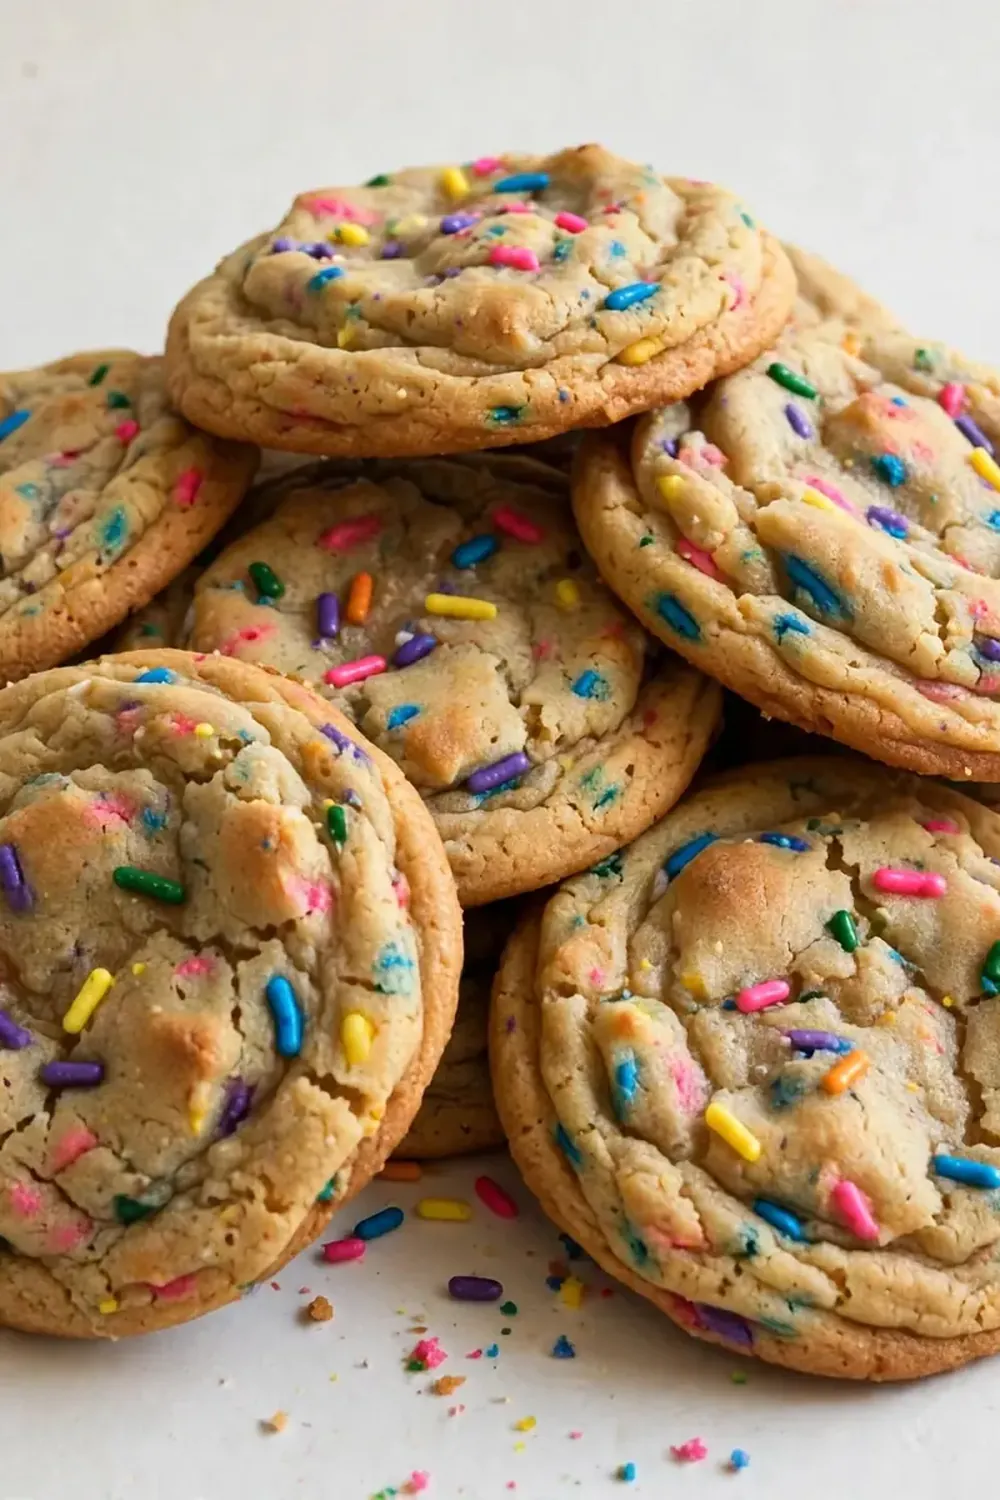
- Fold in the Sprinkles: Switch to a rubber spatula. Gently fold in the rainbow sprinkles and white chocolate chips (if using). You want the sprinkles suspended throughout the dough, not mashed into it. The dough should now look like a celebration—vivid specks of colour against the pale beige base.
- Chill the Dough: Cover the bowl with cling film and refrigerate for at least 30 minutes, or up to 72 hours. This step is non-negotiable. Chilled dough spreads less, resulting in a thicker, chewier centre and a more defined dome. The dough will feel firm and cool to the touch when ready.
- Preheat and Prepare: Preheat your oven to 180°C (160°C fan). Line two baking trays with parchment paper. Scoop the dough into balls roughly 45g each (about 1.5 tablespoons). Roll them between your palms until they are smooth spheres—this creates a uniform shape that bakes evenly.
- Bake to Perfection: Place the dough balls on the trays, leaving at least 5cm between each to allow for spreading. Bake for 10–12 minutes. The edges will be a deep, golden brown and look set, while the centres will still appear pale, soft, and slightly puffed. You will smell the warm vanilla and caramelised butter long before the timer goes off.
- Shape and Cool: Remove the tray from the oven. Immediately place a round cookie cutter (or a large glass) over a warm cookie and gently swirl it in a circular motion. This “scooting” technique pushes the edges inward, creating a perfectly round, uniformly thick cookie. Let the cookies cool on the tray for 5 minutes—they will continue to set from the residual heat—then transfer to a wire rack to cool completely.
Tips From My Kitchen
- Use Jimmies, Not Nonpareils: I used to struggle with this dish until I discovered this technique. “Jimmies” are the long, rod-shaped sprinkles. The tiny round nonpareils (the little balls) tend to bleed their colour into the dough as you mix, turning everything a muddy grey. Jimmies hold their shape and colour, giving you those picture-perfect, distinct rainbow spots.
- The Chilling Mandate: This is the single most important step for a restaurant-quality presentation. Warm dough is soft and spreads into flat, ugly discs. Chilled dough holds its shape, baking up tall and thick. The 30-minute chill is the bare minimum; if you can wait overnight, the flavour deepens and the texture becomes even more chewy.
- Weigh Your Ingredients: A digital kitchen scale is your best friend here. Scooping flour with a cup can lead to packing, which adds too much flour and creates a dry, cakey cookie. Weighing ensures the precise hydration needed for that dense, fudgy centre. The dough should feel slightly greasy and tacky, not dry and crumbly.
- The “Scoot” for Perfection: That step with the cookie cutter isn’t just for aesthetics. As the cookies cool, they naturally deflate a little. By swirling the cutter around the edge while they are still hot, you force the soft centre to redistribute. This eliminates any thin, crisp edges and ensures every bite has that signature chewy texture, from the centre to the very rim.
- Bake on a Cool Tray: Never place dough on a hot baking tray. If you reuse a tray straight from the oven, the butter in the new batch will start melting immediately, causing the cookies to spread excessively before they even hit the heat. Always let your trays cool completely, or run them under cold water and dry them thoroughly between batches.
Delicious Variations to Try
- Spicy Version: Add ½ teaspoon of ground cardamom and a pinch of cayenne pepper to the dry ingredients. The warmth of the spices plays beautifully against the sweet vanilla base and the cool, creamy white chocolate chips, creating a sophisticated adult flavour profile.
- Vegan Option: Substitute the butter with a high-quality block-style vegan butter (not the spreadable kind in a tub) and use a “flax egg” (1 tablespoon ground flaxseed mixed with 3 tablespoons water, left to gel for 10 minutes) for each egg. The texture remains wonderfully chewy, though the dough will be slightly softer, so a longer chill time of one hour is essential.
- Different Protein: Swap the white chocolate chips for an equal amount of finely chopped, toasted pecans or macadamia nuts. This adds a buttery, savoury crunch that contrasts the soft chew, making the cookie feel more like a dense, nut-studded biscotti without the dryness.
What to Serve With Chewy Funfetti Cookies
To elevate these Chewy Funfetti Cookies into a proper dessert course, presentation is everything. I like to serve them slightly warm on a slate board or a white ceramic plate. Here are a few accompaniments that turn a cookie into a composition:
- A dollop of softly whipped, lightly sweetened clotted cream or crème fraîche to cut the sweetness.
- A drizzle of warm salted caramel sauce for a touch of indulgence.
- A small glass of cold milk, but presented in a stemmed glass or a vintage teacup for a whimsical, elegant touch.
- A side of fresh raspberries or sliced strawberries, which add a bright, tart acidity that balances the rich cookie.
- A dusting of icing sugar and a few extra sprinkles on the plate, arranged artfully with a small stencil.
Still hungry for ideas? You might also love Chewy Monster Cookies Recipe For Kids, Soft And Chewy Raspberry Sugar Cookies from our sister kitchens.
Frequently Asked Questions
Chewy Funfetti Cookies
Ingredients
Method
-
Cream the Butter and Sugars: In a large bowl, beat the softened butter, caster sugar, and brown sugar together on medium speed for 3–4 minutes. You are looking for a pale, fluffy mixture that feels light and looks noticeably airy—the sound will shift from a heavy slap to a soft, smooth whisper.
-
Add the Eggs and Vanilla: Beat in the eggs one at a time, ensuring each is fully incorporated before adding the next. The mixture will look glossy and slightly looser. Stir in the vanilla extract until the batter smells fragrant and sweet.
-
Whisk the Dry Ingredients: In a separate bowl, whisk together the plain flour, bicarbonate of soda, and sea salt. This ensures the raising agent is evenly distributed—you don’t want a pocket of soda creating a metallic taste in one single cookie.
-
Combine Wet and Dry: Gradually add the dry ingredients to the wet mixture, mixing on low speed. Stop just as the last streaks of flour disappear. The dough will be thick, sticky, and almost play-dough-like in consistency. Do not overmix; you should see no dry patches, but the dough should still feel soft and pliable.
-
Fold in the Sprinkles: Switch to a rubber spatula. Gently fold in the rainbow sprinkles and white chocolate chips (if using). You want the sprinkles suspended throughout the dough, not mashed into it. The dough should now look like a celebration—vivid specks of colour against the pale beige base.
-
Chill the Dough: Cover the bowl with cling film and refrigerate for at least 30 minutes, or up to 72 hours. This step is non-negotiable. Chilled dough spreads less, resulting in a thicker, chewier centre and a more defined dome. The dough will feel firm and cool to the touch when ready.
-
Preheat and Prepare: Preheat your oven to 180°C (160°C fan). Line two baking trays with parchment paper. Scoop the dough into balls roughly 45g each (about 1.5 tablespoons). Roll them between your palms until they are smooth spheres—this creates a uniform shape that bakes evenly.
-
Bake to Perfection: Place the dough balls on the trays, leaving at least 5cm between each to allow for spreading. Bake for 10–12 minutes. The edges will be a deep, golden brown and look set, while the centres will still appear pale, soft, and slightly puffed. You will smell the warm vanilla and caramelised butter long before the timer goes off.
-
Shape and Cool: Remove the tray from the oven. Immediately place a round cookie cutter (or a large glass) over a warm cookie and gently swirl it in a circular motion. This “scooting” technique pushes the edges inward, creating a perfectly round, uniformly thick cookie. Let the cookies cool on the tray for 5 minutes—they will continue to set from the residual heat—then transfer to a wire rack to cool completely.
Notes
I hope these Chewy Funfetti Cookies become a staple on your dessert table, as they have on mine. There is something deeply satisfying about watching a guest take that first bite—the slight crackle of the edge, the soft give of the centre, and then the knowing smile. Have you tried this recipe or added your own elegant twist? I would love to hear about your plating ideas and serving suggestions in the comments below.