Biscoff Caramel Bars
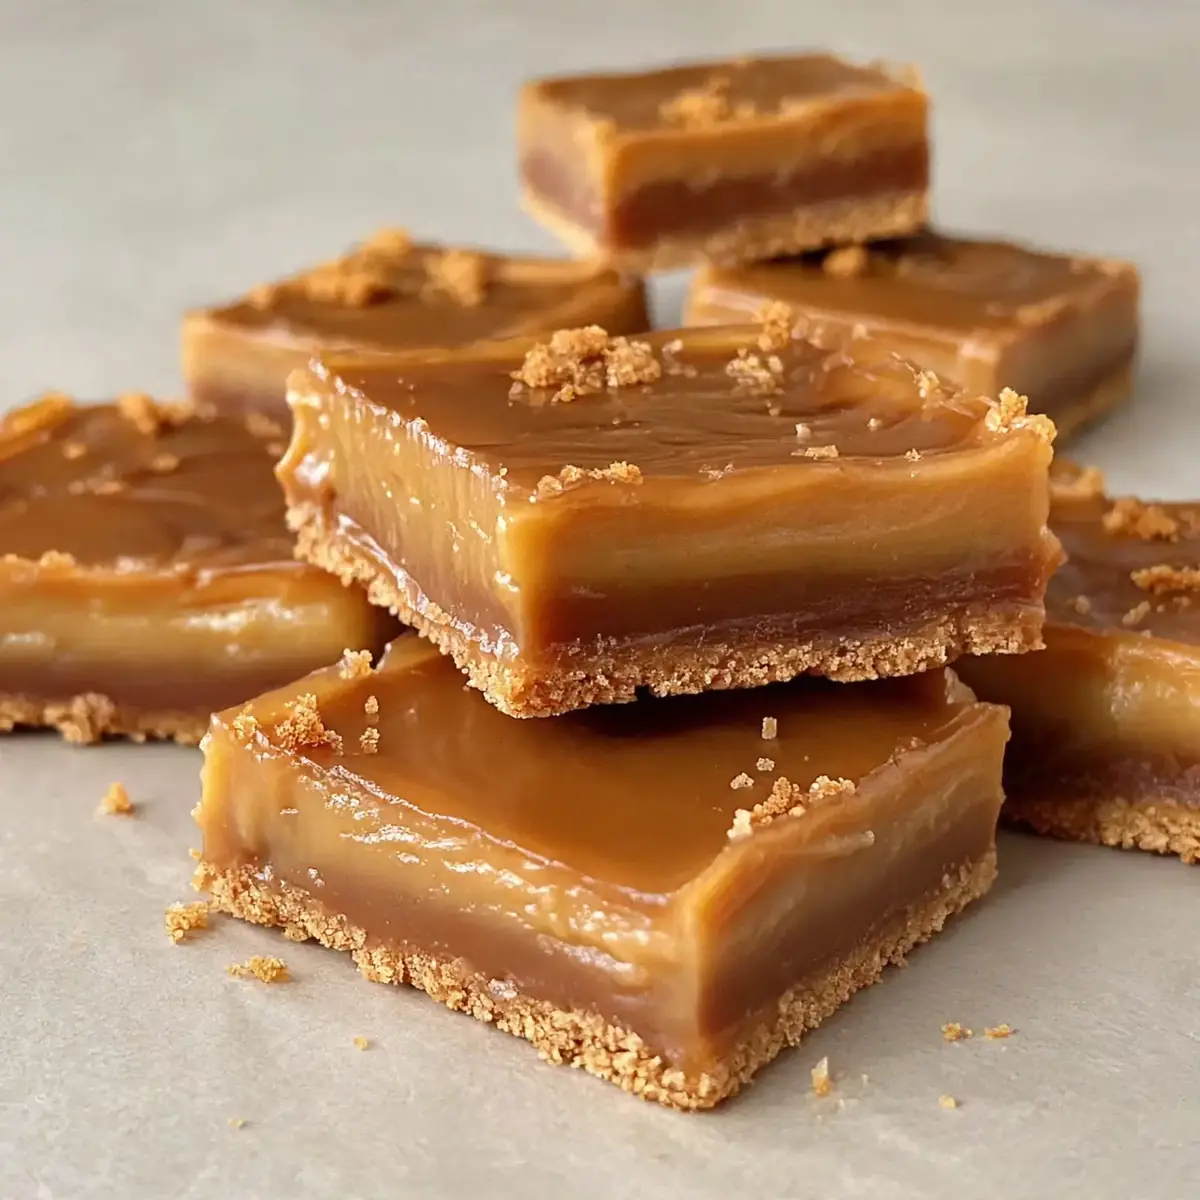
Forget everything you think you know about traybakes. I stumbled upon this combination by accident, and it’s been a hit ever since. These Biscoff Caramel Bars are not just a sweet treat; they are a study in texture and composure, designed to be plated with the confidence of a pastry chef.
Recipe Overview
- Prep Time: 25 minutes
- Cook Time: 25 minutes
- Total Time: 1 hour (plus 2 hours chilling time)
- Servings: 16 generous bars
- Difficulty: Medium
Why You’ll Love This Biscoff Caramel Bars
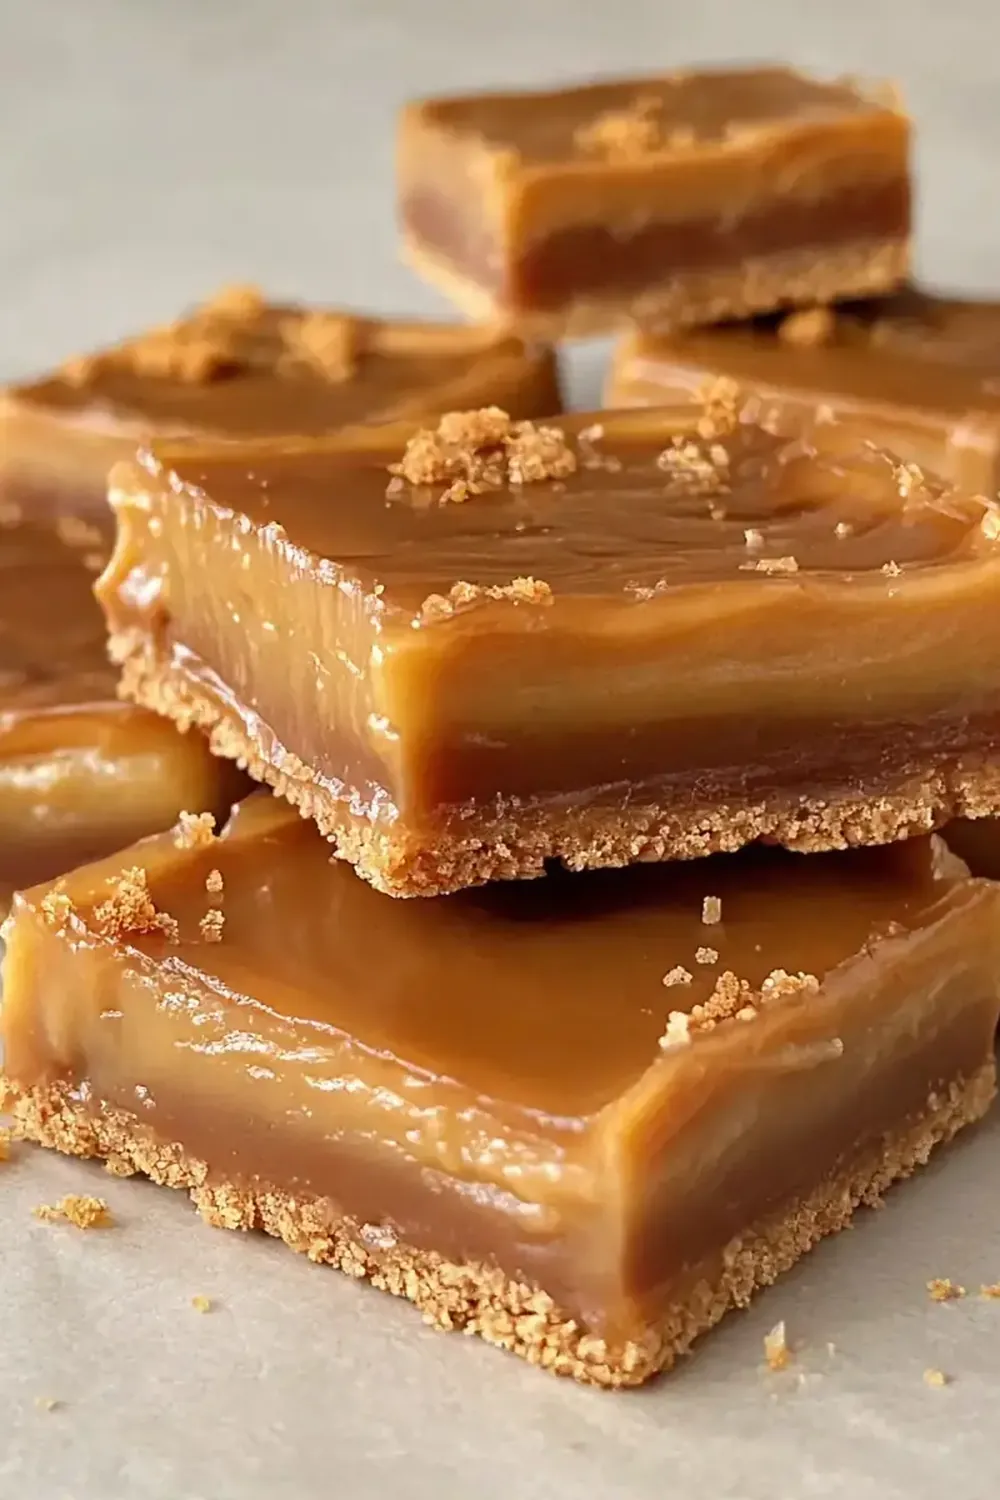
- Restaurant-Quality Plating: The clean, sharp lines of these bars, finished with a delicate drizzle and a sprinkle of sea salt, make them look like they belong on a dessert menu.
- Complex Texture Symphony: You get the snap of a buttery biscuit base, the dense, fudgy chew of the filling, and the silky slick of the caramel topping.
- Deep, Toasted Flavour Profile: The Biscoff spread brings a unique, almost roasted caramelised note that is far more sophisticated than standard chocolate.
- Make-Ahead Mastery: These bars actually improve after a day in the fridge, making them the perfect stress-free choice for entertaining.
- Conversation Starter: The distinct speculoos flavour is familiar enough to be comforting, but unusual enough to spark questions from your guests.
Ingredients You’ll Need
- For the Base:
- 200g Biscoff biscuits (the crunchy ones)
- 100g unsalted butter, melted
- For the Filling:
- 300g smooth Biscoff spread
- 100g unsalted butter, softened
- 200g light brown sugar
- 2 large eggs, at room temperature
- 1 tsp vanilla bean paste (or extract)
- 150g plain flour
- ½ tsp baking powder
- ¼ tsp fine sea salt
- For the Caramel Topping:
- 120g unsalted butter
- 100g light brown sugar
- 3 tbsp golden syrup
- 100ml double cream
- Flaky sea salt, for finishing
Tip: Using vanilla bean paste instead of extract gives you those beautiful, tell-tale black specks that scream ‘homemade with love’ and elevate the visual appeal of the filling.
How to Make Biscoff Caramel Bars
- Prepare the Base: Line a 20cm x 20cm square baking tin with baking paper, leaving an overhang on two sides. Pulse the Biscoff biscuits in a food processor until they resemble fine, dark sand. Pour in the melted butter and pulse again until the mixture clumps together when pinched. Tip the mixture into the tin and press it down firmly and evenly with the base of a glass. The base should feel solid and compact, with a uniform dark brown colour. Pop it in the fridge to set while you make the filling.
- Make the Filling: In a large bowl, beat the softened butter and Biscoff spread together with an electric mixer until they are pale and fluffy. The colour will lighten to a soft tan, and the mixture will look aerated. Add the light brown sugar and beat for another two minutes until the sugar has dissolved and the mixture feels gritty but smooth. Add the eggs one at a time, beating well after each addition. The batter will look glossy and thick. Stir in the vanilla bean paste.
- Combine Dry Ingredients: In a separate bowl, whisk together the plain flour, baking powder, and salt. Fold this into the wet mixture using a spatula until just combined. Do not overmix; you want to see no streaks of flour, but the batter should still be thick and slightly stiff. The smell at this stage is deeply aromatic, like toasted biscuits and vanilla.
- Bake the Base Layer: Preheat your oven to 170°C (fan-assisted). Pour the filling over the chilled biscuit base and spread it into an even layer. Bake for 22-25 minutes. The top should be a deep golden brown, and a skewer inserted into the centre should come out with a few moist crumbs attached, not wet batter. The edges will have pulled away slightly from the tin. Let the bars cool completely in the tin on a wire rack.
- Create the Caramel: While the bars cool, make the caramel. In a medium saucepan over a low heat, combine the butter, light brown sugar, and golden syrup. Stir continuously with a wooden spoon until the butter has melted and the sugar has dissolved. The mixture will look thick and grainy at first, then smooth and shiny. Turn the heat up to medium and let it bubble for 3-4 minutes, stirring constantly. It will darken to a rich amber colour and smell intensely of butterscotch. Remove from the heat and carefully whisk in the double cream. The sauce will bubble up violently, so take care. Whisk until smooth and glossy.
- Assemble and Chill: Pour the hot caramel over the completely cooled Biscoff bar base. Tilt the tin gently to let the caramel run into the corners. Let it sit at room temperature for 10 minutes, then transfer to the fridge for at least 2 hours, or until the caramel is firm to the touch. The caramel should be set but still have a slight give when pressed.
- Plate and Serve: Lift the bars out of the tin using the paper overhang. Place them on a cutting board. Using a sharp, long knife, slice the block into 16 even squares. Wipe the knife clean between cuts for the cleanest edges. Place each bar on a small dessert plate and finish with a delicate sprinkle of flaky sea salt. The contrast of the dark caramel, the pale salt, and the dense bar is visually stunning.
Tips From My Kitchen
- Chill Your Knife: For the cleanest, sharpest cuts that look like they came from a patisserie, dip your knife in very hot water, dry it, and then slice. The heat from the blade helps it glide through the caramel without dragging or cracking it. Wipe the blade clean between every single cut.
- Don’t Rush the Caramel: The key to a smooth, non-grainy caramel is patience. When you add the cream, the mixture will seize and bubble. Do not panic. Keep whisking over the lowest possible heat. It will come back together into a sleek, homogenous sauce. If it separates, a single tablespoon of boiling water whisked in will often save it.
- Use Room Temperature Eggs: This is non-negotiable for a dense, fudgy texture. Cold eggs will seize the butter and Biscoff spread, causing the batter to curdle. If you forget to take them out of the fridge, place them in a bowl of warm water for 5 minutes before using.
- The ‘Dentist’ Test for Doneness: Because these are meant to be dense and fudgy, a clean skewer is not the goal. You want a skewer that comes out with a few moist crumbs clinging to it. If it comes out clean, you have overbaked them and they will be dry.
- Embrace the Flaky Salt: Do not skip the flaky sea salt at the end. It is not just for decoration; it is a crucial component of the dish. The salt crystals cut through the intense sweetness of the caramel and the Biscoff, creating a balanced, complex flavour that makes each bite feel elevated and sophisticated.
Equipment You’ll Need
- 20cm x 20cm square baking tin
- Baking paper
- Food processor
- Electric hand mixer or stand mixer
- Medium saucepan
- Large mixing bowl
- Wooden spoon or silicone spatula
- Sharp chef’s knife
Delicious Variations to Try
- Dark Chocolate Drizzle: After the caramel has set, melt 50g of good-quality dark chocolate (70% cocoa) and drizzle it over the top in a zigzag pattern. This adds a bitter counterpoint that works beautifully with the sweet Biscoff.
- Crunchy Topping: Before the caramel sets, scatter over a handful of crushed Biscoff biscuits and some toasted flaked almonds. This adds a wonderful textural crunch that contrasts with the smooth caramel.
- Peanut Butter Swirl: Warm 3 tablespoons of smooth peanut butter until it is runny, and swirl it into the filling before baking. This creates marbled ribbons of flavour that make each slice look unique.
What to Serve With Biscoff Caramel Bars
- A dollop of lightly whipped, unsweetened double cream to cut the sweetness.
- A small scoop of good-quality vanilla ice cream.
- For a stunning dessert board, serve alongside a Rose Lemonade Mocktail to cleanse the palate between rich bites.
- A handful of fresh raspberries or strawberries on the plate, their acidity balancing the caramel.
Still hungry for ideas? You might also love Salted Caramel Apple Pie Bars Recipe, Coffee Caramel Cheesecake Bars Recipe Dessert from our sister kitchens.
Frequently Asked Questions
Biscoff Caramel Bars
Ingredients
Method
- Prepare the Base: Line a 20cm x 20cm square baking tin with baking paper, leaving an overhang on two sides. Pulse the Biscoff biscuits in a food processor until they resemble fine, dark sand. Pour in the melted butter and pulse again until the mixture clumps together when pinched. Tip the mixture into the tin and press it down firmly and evenly with the base of a glass. The base should feel solid and compact, with a uniform dark brown colour. Pop it in the fridge to set while you make the filling.
- Make the Filling: In a large bowl, beat the softened butter and Biscoff spread together with an electric mixer until they are pale and fluffy. The colour will lighten to a soft tan, and the mixture will look aerated. Add the light brown sugar and beat for another two minutes until the sugar has dissolved and the mixture feels gritty but smooth. Add the eggs one at a time, beating well after each addition. The batter will look glossy and thick. Stir in the vanilla bean paste.
- Combine Dry Ingredients: In a separate bowl, whisk together the plain flour, baking powder, and salt. Fold this into the wet mixture using a spatula until just combined. Do not overmix; you want to see no streaks of flour, but the batter should still be thick and slightly stiff. The smell at this stage is deeply aromatic, like toasted biscuits and vanilla.
- Bake the Base Layer: Preheat your oven to 170°C (fan-assisted). Pour the filling over the chilled biscuit base and spread it into an even layer. Bake for 22-25 minutes. The top should be a deep golden brown, and a skewer inserted into the centre should come out with a few moist crumbs attached, not wet batter. The edges will have pulled away slightly from the tin. Let the bars cool completely in the tin on a wire rack.
- Create the Caramel: While the bars cool, make the caramel. In a medium saucepan over a low heat, combine the butter, light brown sugar, and golden syrup. Stir continuously with a wooden spoon until the butter has melted and the sugar has dissolved. The mixture will look thick and grainy at first, then smooth and shiny. Turn the heat up to medium and let it bubble for 3-4 minutes, stirring constantly. It will darken to a rich amber colour and smell intensely of butterscotch. Remove from the heat and carefully whisk in the double cream. The sauce will bubble up violently, so take care. Whisk until smooth and glossy.
- Assemble and Chill: Pour the hot caramel over the completely cooled Biscoff bar base. Tilt the tin gently to let the caramel run into the corners. Let it sit at room temperature for 10 minutes, then transfer to the fridge for at least 2 hours, or until the caramel is firm to the touch. The caramel should be set but still have a slight give when pressed.
- Plate and Serve: Lift the bars out of the tin using the paper overhang. Place them on a cutting board. Using a sharp, long knife, slice the block into 16 even squares. Wipe the knife clean between cuts for the cleanest edges. Place each bar on a small dessert plate and finish with a delicate sprinkle of flaky sea salt. The contrast of the dark caramel, the pale salt, and the dense bar is visually stunning.
Notes
After testing this recipe five times, I finally got it just right. The clean lines, the glossy caramel, the whisper of salt — these are the details that turn a simple bar into a statement. I would love to hear how you plate yours and what small, personal touches you add to make them your own. Share your thoughts and photos in the comments below!