Thick And Chewy Snickerdoodle Bars
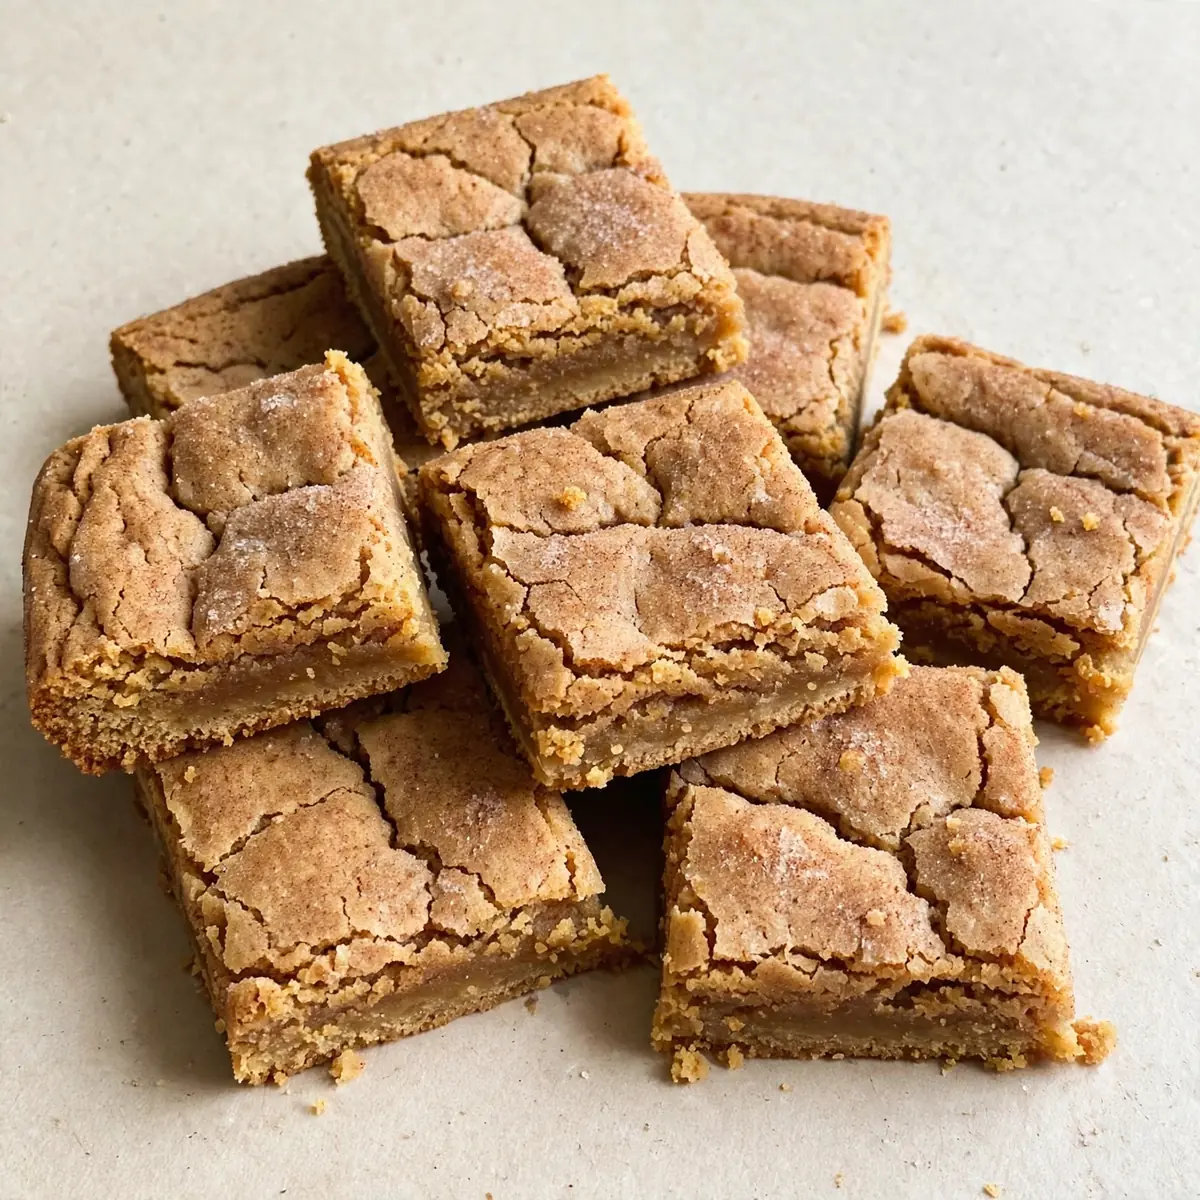
I believe the most memorable dinner parties end with a dessert that looks as though it required hours of meticulous piping and tempering, when in reality, you simply pressed a buttery dough into a tin and let the oven work its magic. These Thick and Chewy Snickerdoodle Bars are that exact trick—a towering slab of cinnamon-sugar perfection that, with a few plating touches, transforms from humble bar into a restaurant-calibre finale.
Recipe Overview
- Prep Time: 20 minutes
- Cook Time: 25–28 minutes
- Total Time: 45 minutes (plus 20 minutes cooling)
- Servings: 16 generous bars
- Difficulty: Easy
Why You’ll Love This Thick and Chewy Snickerdoodle Bars
- Restaurant-quality presentation: With a clean, sharp cut and a dusting of cinnamon sugar, these bars look like they came from a patisserie counter—not your home kitchen.
- That signature chew: The combination of melted butter and an extra egg yolk gives a dense, fudgy centre that stays soft for days, so you can bake ahead without worry.
- No rolling or chilling: Unlike traditional snickerdoodle cookies, there is no need to chill the dough or roll individual balls—just press, bake, and slice for an effortless showstopper.
- Perfectly balanced spice: The cinnamon-sugar topping is applied twice for a deep, crackly crust that contrasts beautifully with the tender, buttery interior.
- Guests always ask for the recipe: Friends always ask me for this recipe after trying it at dinner parties. The thick, square shape feels modern and intentional, making it a conversation starter on any dessert table.
Ingredients You’ll Need
- 250g unsalted butter, melted and slightly cooled
- 200g granulated sugar
- 100g light brown sugar, packed
- 2 large eggs, at room temperature
- 1 large egg yolk, at room temperature
- 2 teaspoons vanilla extract
- 400g plain flour
- 2 teaspoons cream of tartar
- 1 teaspoon bicarbonate of soda
- ½ teaspoon fine sea salt
- ¼ teaspoon ground nutmeg
- For the cinnamon-sugar coating:
- 60g granulated sugar
- 2 tablespoons ground cinnamon
Tip: Cream of tartar is non-negotiable here—it gives snickerdoodles their characteristic tang and helps the bars stay thick and tender. Do not substitute it with baking powder alone.
Equipment You’ll Need
- 23cm x 23cm square baking tin (9×9 inch)
- Parchment paper
- Large mixing bowls
- Whisk and rubber spatula
- Sharp knife and cutting board for slicing
- Fine-mesh sieve for dusting
How to Make Thick and Chewy Snickerdoodle Bars
- Preheat and prepare the tin: Preheat your oven to 180°C (350°F) fan-forced. Line your 23cm square tin with parchment paper, leaving a 5cm overhang on two opposite sides—this will be your sling for lifting the bars out later. The paper should lie flat against the corners.
- Mix the wet ingredients: In a large bowl, whisk together the melted butter, granulated sugar, and brown sugar until the mixture looks glossy and thick, about 1 minute. You should smell the rich, caramel-like aroma of the butter and sugars combining. Add the whole eggs, egg yolk, and vanilla extract, then whisk vigorously until the batter is smooth, pale yellow, and slightly aerated—about 2 minutes. The texture will feel like a thick, pourable custard.
- Combine the dry ingredients: In a separate bowl, sift together the plain flour, cream of tartar, bicarbonate of soda, salt, and nutmeg. Sifting is important here to break up the cream of tartar, which tends to clump. The flour mixture should look light and uniform in colour.
- Fold the dough together: Pour the dry ingredients into the wet mixture. Using a rubber spatula, fold gently until just combined—stop when you no longer see streaks of flour. The dough will be very thick and slightly sticky, like a soft cookie dough. Do not overmix, or the bars will turn out tough. If the dough seems too soft to press, let it rest for 5 minutes; the flour will hydrate and firm up.
- Layer the cinnamon sugar: In a small bowl, stir together the 60g granulated sugar and 2 tablespoons cinnamon until evenly mixed and fragrant. Spread about a third of the dough into the prepared tin, pressing it into an even layer with your fingertips. The layer should be about 1cm thick. Sprinkle half of the cinnamon-sugar mixture evenly over this first layer—you will see the sugar crystals glistening against the dough. Drop the remaining dough in spoonfuls on top, then gently press it out to cover the cinnamon layer completely. It will seem uneven, but that is fine; the second layer of dough will bake into a beautiful marbled effect. Sprinkle the remaining cinnamon sugar on top, ensuring full coverage right to the edges.
- Bake to perfection: Bake for 25–28 minutes. At 22 minutes, the bars will look pale and jiggly in the centre—do not pull them out yet. Wait until the edges are a deep golden brown and have pulled away slightly from the parchment, and the centre is just set with a slight crackle on the surface. The top should feel dry to the touch but still soft underneath. A toothpick inserted into the centre should come out with a few moist crumbs, not wet batter. The smell of cinnamon and toasted butter will fill your kitchen.
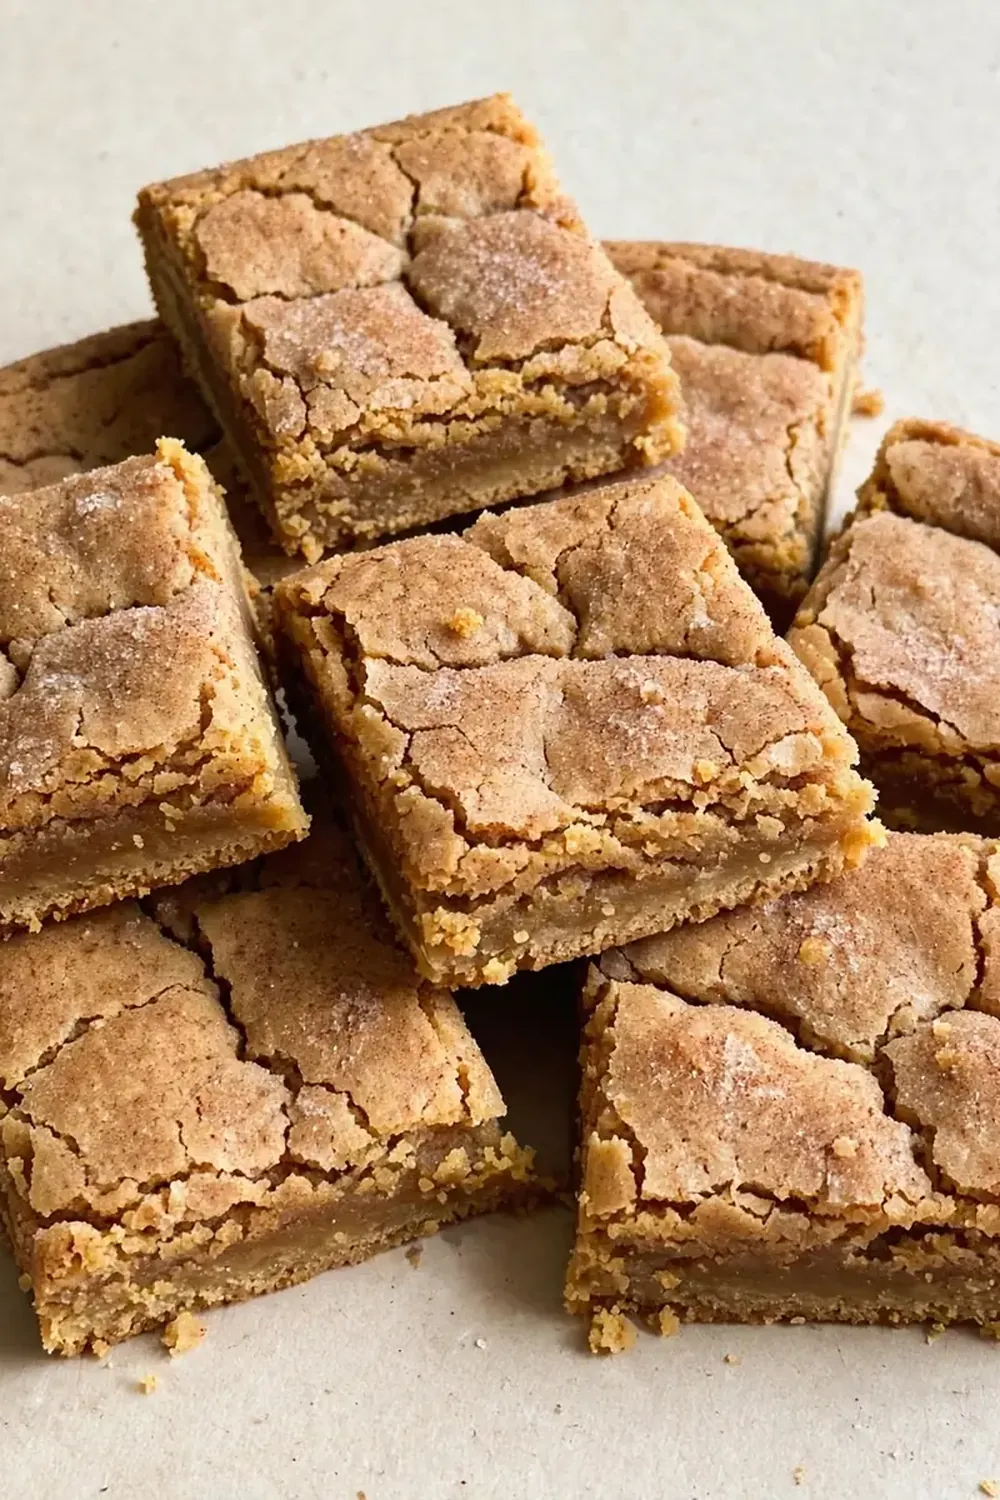
- Cool and slice: Place the tin on a wire rack and let the bars cool completely in the tin for at least 20 minutes. This resting time is critical—the bars will continue to set as they cool. After cooling, lift the bars out using the parchment overhang and transfer to a cutting board. Using a sharp knife, trim the edges for a clean look (you can snack on those trimmings), then cut into 16 even squares. For the most precise cuts, wipe the knife clean between each slice. The bars should be thick, about 2.5cm tall, with a crackly cinnamon crust and a soft, chewy interior.
Tips From My Kitchen
- Use room-temperature eggs: Cold eggs will seize the melted butter, creating a lumpy, uneven dough. Let your eggs sit on the counter for 30 minutes before starting, or place them in a bowl of warm water for 5 minutes. The dough will come together smoothly and bake more evenly.
- Press the second dough layer gently: When adding the top layer of dough over the first cinnamon-sugar layer, use your fingertips to press it out gently. If you press too hard, you will mix the cinnamon into the dough, losing the distinct swirl effect. Aim for a gentle, patting motion until the surface is mostly even.
- Do not overbake for the sake of colour: Snickerdoodle bars can go from perfectly chewy to dry and crumbly in just two minutes. Trust the visual cues: the edges should be deep golden, but the centre should still look slightly soft. The residual heat in the tin will finish the baking as it cools.
- Double the cinnamon sugar for a restaurant finish: I like to set aside an extra tablespoon of the cinnamon-sugar mixture and, after slicing, dust it over the bars through a fine-mesh sieve. This gives a fresh, vibrant spice hit and a professional-looking finish that catches the light beautifully.
- Slice only when completely cool: Warm bars are fragile and will crumble or stick to your knife. Patience here pays off—cooled bars slice cleanly, revealing a neat, dense crumb that looks stunning on a plate. This is my go-to recipe when I need something quick but impressive, and clean slicing makes all the difference.
Common Mistakes to Avoid
- Overcrowding the pan: If you use a tin smaller than 23cm, the bars will be too thick and may not bake through in the centre, resulting in a raw, goopy middle. Stick to the recommended size for even thickness and baking.
- Wrong temperature: Baking at too high a temperature will set the edges before the centre has a chance to rise, creating a dome-shaped bar with a hard rim. Keep your oven at 180°C (350°F) fan-forced, and always use an oven thermometer to verify accuracy.
- Skipping the rest time: Cutting into the bars while they are still warm will cause them to squish and lose their thick, square shape. The 20-minute rest in the tin allows the structure to firm up, giving you those clean, restaurant-style slices.
What to Serve With Thick and Chewy Snickerdoodle Bars
- A dollop of lightly whipped cream with a hint of vanilla—the cool, airy texture contrasts beautifully with the dense, spiced bar.
- A scoop of vanilla bean ice cream allowed to soften slightly, so it melts into the warm crumb.
- A dusting of icing sugar and a few fresh mint leaves for colour—this simple garnish elevates the presentation instantly.
- For a drink pairing, try a glass of cold milk or a sophisticated Rose Lemonade Mocktail for a floral, citrusy counterpoint.
- A small dish of warm caramel sauce for dipping—the sweetness plays beautifully with the cinnamon.
Still hungry for ideas? You might also love Chewy Banana Oat Breakfast Bars Recipe To Bake from our sister kitchens.
Frequently Asked Questions
Thick and Chewy Snickerdoodle Bars
Ingredients
Method
- Preheat and prepare the tin: Preheat your oven to 180°C (350°F) fan-forced. Line your 23cm square tin with parchment paper, leaving a 5cm overhang on two opposite sides—this will be your sling for lifting the bars out later. The paper should lie flat against the corners.
- Mix the wet ingredients: In a large bowl, whisk together the melted butter, granulated sugar, and brown sugar until the mixture looks glossy and thick, about 1 minute. You should smell the rich, caramel-like aroma of the butter and sugars combining. Add the whole eggs, egg yolk, and vanilla extract, then whisk vigorously until the batter is smooth, pale yellow, and slightly aerated—about 2 minutes. The texture will feel like a thick, pourable custard.
- Combine the dry ingredients: In a separate bowl, sift together the plain flour, cream of tartar, bicarbonate of soda, salt, and nutmeg. Sifting is important here to break up the cream of tartar, which tends to clump. The flour mixture should look light and uniform in colour.
- Fold the dough together: Pour the dry ingredients into the wet mixture. Using a rubber spatula, fold gently until just combined—stop when you no longer see streaks of flour. The dough will be very thick and slightly sticky, like a soft cookie dough. Do not overmix, or the bars will turn out tough. If the dough seems too soft to press, let it rest for 5 minutes; the flour will hydrate and firm up.
- Layer the cinnamon sugar: In a small bowl, stir together the 60g granulated sugar and 2 tablespoons cinnamon until evenly mixed and fragrant. Spread about a third of the dough into the prepared tin, pressing it into an even layer with your fingertips. The layer should be about 1cm thick. Sprinkle half of the cinnamon-sugar mixture evenly over this first layer—you will see the sugar crystals glistening against the dough. Drop the remaining dough in spoonfuls on top, then gently press it out to cover the cinnamon layer completely. It will seem uneven, but that is fine; the second layer of dough will bake into a beautiful marbled effect. Sprinkle the remaining cinnamon sugar on top, ensuring full coverage right to the edges.
- Bake to perfection: Bake for 25–28 minutes. At 22 minutes, the bars will look pale and jiggly in the centre—do not pull them out yet. Wait until the edges are a deep golden brown and have pulled away slightly from the parchment, and the centre is just set with a slight crackle on the surface. The top should feel dry to the touch but still soft underneath. A toothpick inserted into the centre should come out with a few moist crumbs, not wet batter. The smell of cinnamon and toasted butter will fill your kitchen.
- Cool and slice: Place the tin on a wire rack and let the bars cool completely in the tin for at least 20 minutes. This resting time is critical—the bars will continue to set as they cool. After cooling, lift the bars out using the parchment overhang and transfer to a cutting board. Using a sharp knife, trim the edges for a clean look (you can snack on those trimmings), then cut into 16 even squares. For the most precise cuts, wipe the knife clean between each slice. The bars should be thick, about 2.5cm tall, with a crackly cinnamon crust and a soft, chewy interior.
Notes
I hope these Thick and Chewy Snickerdoodle Bars become your new secret weapon for impressing guests without breaking a sweat. The combination of a crackly cinnamon crust and a dense, buttery centre is genuinely hard to resist, and the clean, square slices look like they belong on a dessert menu. If you give them a try, let me know how you styled them on the plate—did you go for a dusting of icing sugar, a scoop of ice cream, or perhaps a drizzle of caramel? Share your thoughts in the comments below; I always love hearing about your kitchen successes.