Easy Lemon Meringue Pie

There’s a quiet confidence that comes from setting a wobbly, golden-topped lemon meringue pie on the table—it says you’ve taken your time, you care about detail, and you’re not afraid of a bit of theatre. I’ve always believed that a dessert like this, with its cloud of toasted meringue and sharp, silky curd, is the ultimate trick for home cooks who want to look like they’ve trained in a professional kitchen. After years of tweaking, I’ve landed on a version that feels genuinely special yet stays within reach of a Tuesday evening—no double boilers, no guesswork, just a stunning result that makes guests lean in for a closer look.
Recipe Overview
- Prep Time: 35 minutes
- Cook Time: 30 minutes
- Total Time: 3 hours (including chilling)
- Servings: 8 generous slices
- Difficulty: Medium—impressive, but totally doable
Why You’ll Love This Easy Lemon Meringue Pie
- Restaurant-quality presentation at home: This isn’t just a pie—it’s a centrepiece. The tall, glossy meringue with toasted peaks and the neat, golden crust makes it look like it’s come straight from a patisserie counter. My husband, who’s usually picky, asked for seconds!
- A reliable, no-fuss lemon filling: No more curdling or scrambling. This method uses a simple saucepan technique that gives you a thick, smooth curd every time, with a bright citrus zing that cuts through the sweetness.
- Make-ahead friendly for stress-free hosting: You can bake the base and prepare the lemon filling a day ahead. Just whip and brown the meringue on the day—it takes the pressure off when you’re entertaining.
- Uses standard pantry ingredients: No hunting for obscure items. Eggs, butter, sugar, lemons, and a few baking staples—that’s it. I make this at least once a week—it’s become a family favourite.
- Stunning texture contrast in every bite: The crisp, buttery biscuit base, the velvety lemon curd, and the light, airy meringue create a trio of textures that feels luxurious and deeply satisfying.

Ingredients You’ll Need
- For the biscuit base:
- 250g plain digestive biscuits (or any buttery biscuit)
- 125g unsalted butter, melted
- 2 tablespoons caster sugar
- For the lemon filling:
- 4 large egg yolks (save the whites for the meringue)
- 400ml condensed milk (one standard tin)
- 120ml freshly squeezed lemon juice (about 3 large lemons)
- 1 tablespoon finely grated lemon zest
- For the meringue topping:
- 4 large egg whites
- 200g caster sugar
- ½ teaspoon cream of tartar
- ½ teaspoon vanilla extract
Tip: For the best meringue, use eggs that are a few days old—they whip up higher and hold their shape better than super-fresh ones. Also, make sure your mixing bowl is completely clean and free of any grease (wipe it with a little lemon juice on kitchen paper for safety).
How to Make Easy Lemon Meringue Pie
- Prepare the biscuit base: Preheat your oven to 180°C (160°C fan). Crush the digestive biscuits into fine crumbs—I put them in a sealed bag and bash them with a rolling pin until they feel like damp sand. Mix the crumbs with the melted butter and caster sugar until everything is evenly moistened. Press the mixture firmly into the base and up the sides of a 23cm loose-bottomed tart tin. Use the bottom of a glass to compact it—you want it tight so it doesn’t crumble when sliced. Bake for 10 minutes until it smells toasty and the edges look slightly darker. Set aside to cool completely.
- Make the lemon filling: In a medium saucepan, whisk together the egg yolks, condensed milk, lemon juice, and lemon zest. Place over a medium-low heat and stir constantly with a wooden spoon or silicone spatula. You’ll see the mixture start to thicken after about 5–6 minutes—it will go from a thin, runny liquid to a creamy, custard-like consistency that coats the back of the spoon. When it leaves a clear trail when you drag your finger across the spoon, it’s done. Remove from the heat immediately. Pour the filling into the cooled biscuit base and spread it evenly. Let it sit at room temperature for 15 minutes, then refrigerate for at least 2 hours until fully set.
- Whip the meringue: In a large, spotlessly clean bowl, beat the egg whites with an electric mixer on medium speed until they become frothy and look like sea foam. Add the cream of tartar and continue beating. Gradually add the caster sugar, a tablespoon at a time, while the mixer runs. The mixture will transform from a bubbly liquid into a thick, glossy white cloud. Keep beating until it forms stiff peaks—when you lift the beaters, the meringue should stand up in firm points that don’t droop. Add the vanilla extract and beat for another 10 seconds. You’ll know it’s ready when it feels silky and holds its shape like shaving foam.
- Assemble and toast: Spoon the meringue onto the chilled lemon filling, starting at the edges to seal them completely—this prevents weeping. Use a spatula to create dramatic peaks and swirls all over the top. For a professional look, I like to pull the meringue up into tall spikes. Now, you can either use a kitchen blowtorch (my preferred method) to toast the meringue until it’s golden brown and smells like toasted marshmallows, or place the pie under a hot grill for 2–3 minutes. If using the grill, watch it like a hawk—it can go from golden to burnt in seconds. The meringue should develop dark caramel spots and a nutty aroma.
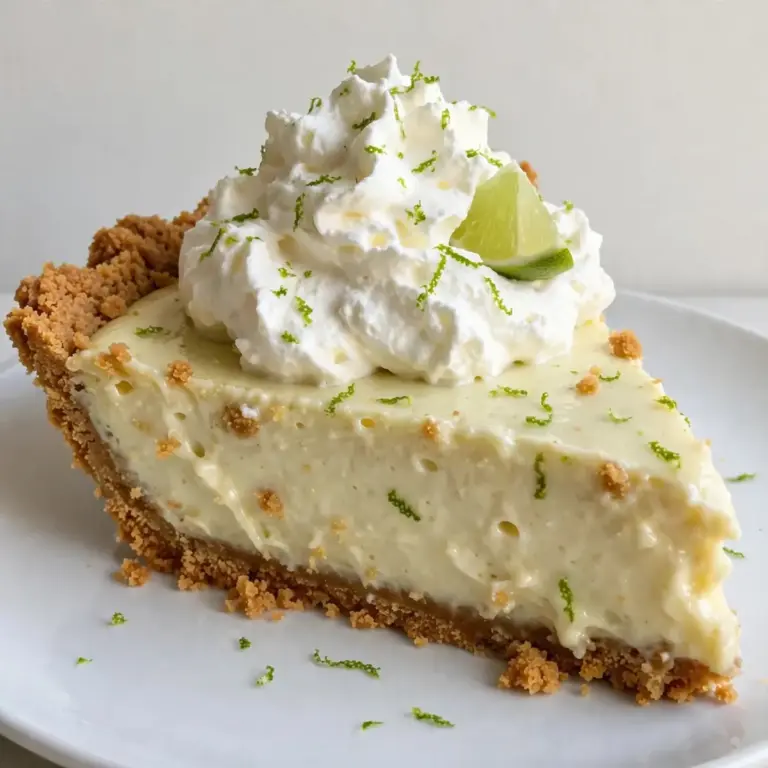
- Cool and serve: Let the pie sit at room temperature for 20 minutes before slicing. This allows the meringue to settle and makes cutting cleaner. Use a sharp knife dipped in hot water and wiped dry between slices for the neatest presentation. Each slice should show the crisp biscuit layer, the sunny yellow curd, and the cloud-like meringue in perfect stripes.
Tips From My Kitchen
- Use a kitchen blowtorch for better control: A blowtorch gives you precise control over the meringue toasting, letting you create dramatic, uneven golden patches that look artisanal. The grill can work, but it heats the whole surface at once and sometimes cooks the meringue unevenly, leaving some parts underdone. I’ve found the blowtorch method takes about 60 seconds and gives a far more impressive finish.
- Don’t skip the cream of tartar: This little ingredient is a stabiliser for the egg whites. It helps the meringue hold its structure for longer and prevents it from deflating or weeping after baking. If you don’t have it, a few drops of lemon juice work as a substitute, but cream of tartar is more reliable.
- Chill the lemon filling completely before adding meringue: If the filling is even slightly warm, it can cause the meringue to slide off or create a soggy layer. Wait until the curd is fully cold and set—at least 2 hours in the fridge. The difference in temperature also helps create that beautiful contrast when you slice into it.
- Seal the edges of the meringue to the pastry: When spooning on the meringue, make sure it touches the biscuit base all the way around. If there’s a gap, the filling can seep out during toasting, and the meringue may shrink away from the edges. A tight seal keeps everything tidy and gives you that perfect, professional finish.
- Let the pie rest after toasting: I know it’s tempting to cut straight in, but giving the pie 20 minutes at room temperature allows the meringue to set slightly and makes slicing much cleaner. The filling also firms up a little, so you don’t end up with a runny mess on your plate.
- For a crispier biscuit base, blind bake with weights: If you have baking beans or dried pulses, line the biscuit base with baking paper and fill with weights before baking. This prevents the base from puffing up or shrinking. It’s an extra step, but it guarantees a perfectly even, crunchy crust every time.
Common Mistakes to Avoid
- Overcrowding the pan: If you’re making a larger pie or using a deep tin, don’t try to pile all the filling in at once—it won’t set evenly. Work in layers, allowing each to firm up in the fridge before adding the next. This ensures a clean, even set throughout.
- Wrong temperature: The lemon filling should be cooked over medium-low heat, not high. A fierce heat will scramble the egg yolks, leaving you with a lumpy, curdled mess. Keep it gentle and stir constantly—the mixture should steam, not bubble. If you see bubbles, the heat is too high.
- Skipping the rest time: Cutting into the pie immediately after toasting the meringue is the number one mistake I see. The filling needs time to firm up after being chilled, and the meringue needs a moment to settle. Waiting 20 minutes transforms a messy slice into a beautiful, clean wedge.
Delicious Variations to Try
- Lime and Coconut Twist: Swap the lemon juice and zest for fresh lime juice and zest (about 6 limes). Add 50g of desiccated coconut to the biscuit base mixture for a tropical lift. The meringue can be toasted as usual—the lime gives a sharper, more floral flavour that pairs beautifully with the coconut.
- Orange Blossom Version: Use orange juice and zest instead of lemon, and add 1 tablespoon of orange blossom water to the filling. The floral notes elevate the pie into something elegant and fragrant—perfect for a spring dinner party. Reduce the sugar slightly if you find orange blossom water too sweet.
- Spiced Gingerbread Base: Replace the digestive biscuits with ginger nut biscuits for a warming, spicy crust. Add ½ teaspoon of ground ginger and ¼ teaspoon of cinnamon to the crumb mixture. The ginger heat contrasts beautifully with the cool, sharp lemon filling—it’s a winter-friendly twist that always gets compliments.
What to Serve With Easy Lemon Meringue Pie
- A generous dollop of clotted cream or crème fraîche—the richness balances the sharp lemon.
- A handful of fresh raspberries or blueberries scattered on the plate for colour and a pop of acidity.
- A light dusting of icing sugar and a few mint leaves for a professional, clean finish.
- A pot of strong Earl Grey tea or a chilled glass of sparkling water with lemon—anything too sweet will compete with the pie.
Still hungry for ideas? You might also love Lemon Meringue Cheesecake, Triple Lemon Meringue Cheesecake A Showstopper Recipe from our sister kitchens.
Frequently Asked Questions
Easy Lemon Meringue Pie
Ingredients
Method
-
Prepare the biscuit base: Preheat your oven to 180°C (160°C fan). Crush the digestive biscuits into fine crumbs—I put them in a sealed bag and bash them with a rolling pin until they feel like damp sand. Mix the crumbs with the melted butter and caster sugar until everything is evenly moistened. Press the mixture firmly into the base and up the sides of a 23cm loose-bottomed tart tin. Use the bottom of a glass to compact it—you want it tight so it doesn’t crumble when sliced. Bake for 10 minutes until it smells toasty and the edges look slightly darker. Set aside to cool completely.
-
Make the lemon filling: In a medium saucepan, whisk together the egg yolks, condensed milk, lemon juice, and lemon zest. Place over a medium-low heat and stir constantly with a wooden spoon or silicone spatula. You’ll see the mixture start to thicken after about 5–6 minutes—it will go from a thin, runny liquid to a creamy, custard-like consistency that coats the back of the spoon. When it leaves a clear trail when you drag your finger across the spoon, it’s done. Remove from the heat immediately. Pour the filling into the cooled biscuit base and spread it evenly. Let it sit at room temperature for 15 minutes, then refrigerate for at least 2 hours until fully set.
-
Whip the meringue: In a large, spotlessly clean bowl, beat the egg whites with an electric mixer on medium speed until they become frothy and look like sea foam. Add the cream of tartar and continue beating. Gradually add the caster sugar, a tablespoon at a time, while the mixer runs. The mixture will transform from a bubbly liquid into a thick, glossy white cloud. Keep beating until it forms stiff peaks—when you lift the beaters, the meringue should stand up in firm points that don’t droop. Add the vanilla extract and beat for another 10 seconds. You’ll know it’s ready when it feels silky and holds its shape like shaving foam.
-
Assemble and toast: Spoon the meringue onto the chilled lemon filling, starting at the edges to seal them completely—this prevents weeping. Use a spatula to create dramatic peaks and swirls all over the top. For a professional look, I like to pull the meringue up into tall spikes. Now, you can either use a kitchen blowtorch (my preferred method) to toast the meringue until it’s golden brown and smells like toasted marshmallows, or place the pie under a hot grill for 2–3 minutes. If using the grill, watch it like a hawk—it can go from golden to burnt in seconds. The meringue should develop dark caramel spots and a nutty aroma.
-
Cool and serve: Let the pie sit at room temperature for 20 minutes before slicing. This allows the meringue to settle and makes cutting cleaner. Use a sharp knife dipped in hot water and wiped dry between slices for the neatest presentation. Each slice should show the crisp biscuit layer, the sunny yellow curd, and the cloud-like meringue in perfect stripes.
Notes
I’d love to hear how your Easy Lemon Meringue Pie turns out—drop a comment below with your own plating ideas or any tweaks you made. There’s nothing quite like the moment your guests take that first bite and look up with surprise. For more recipes that impress without the stress, explore Sweettable.Online or browse our collection of All Recipes. And if you’re in the mood for another showstopper, our Chocolate Treats category is full of indulgent ideas.