Classic Red Velvet Cheesecake
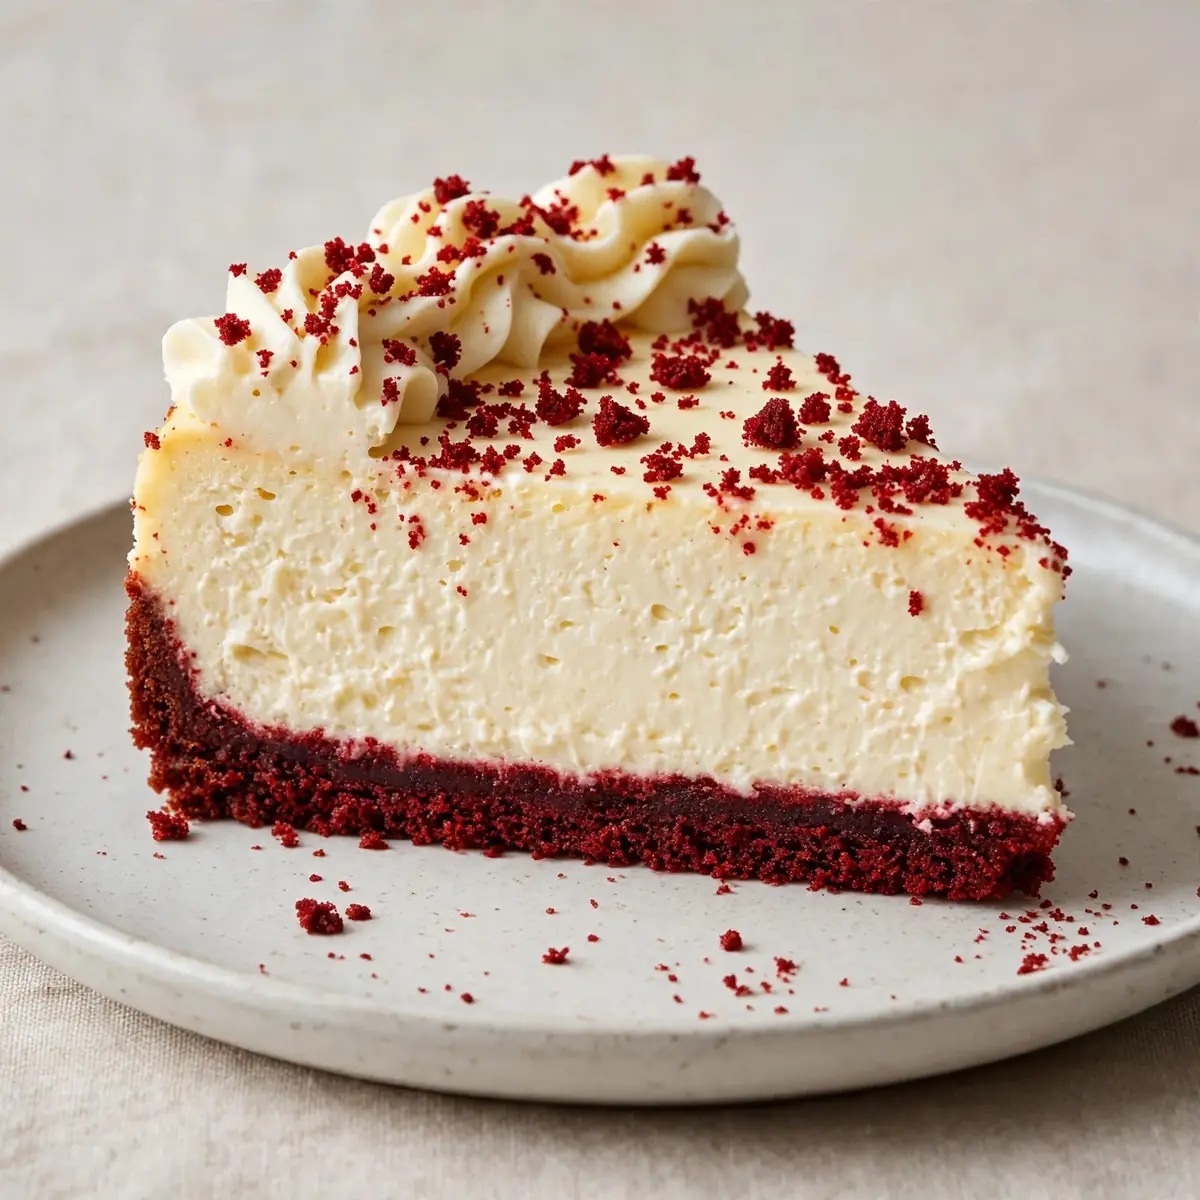
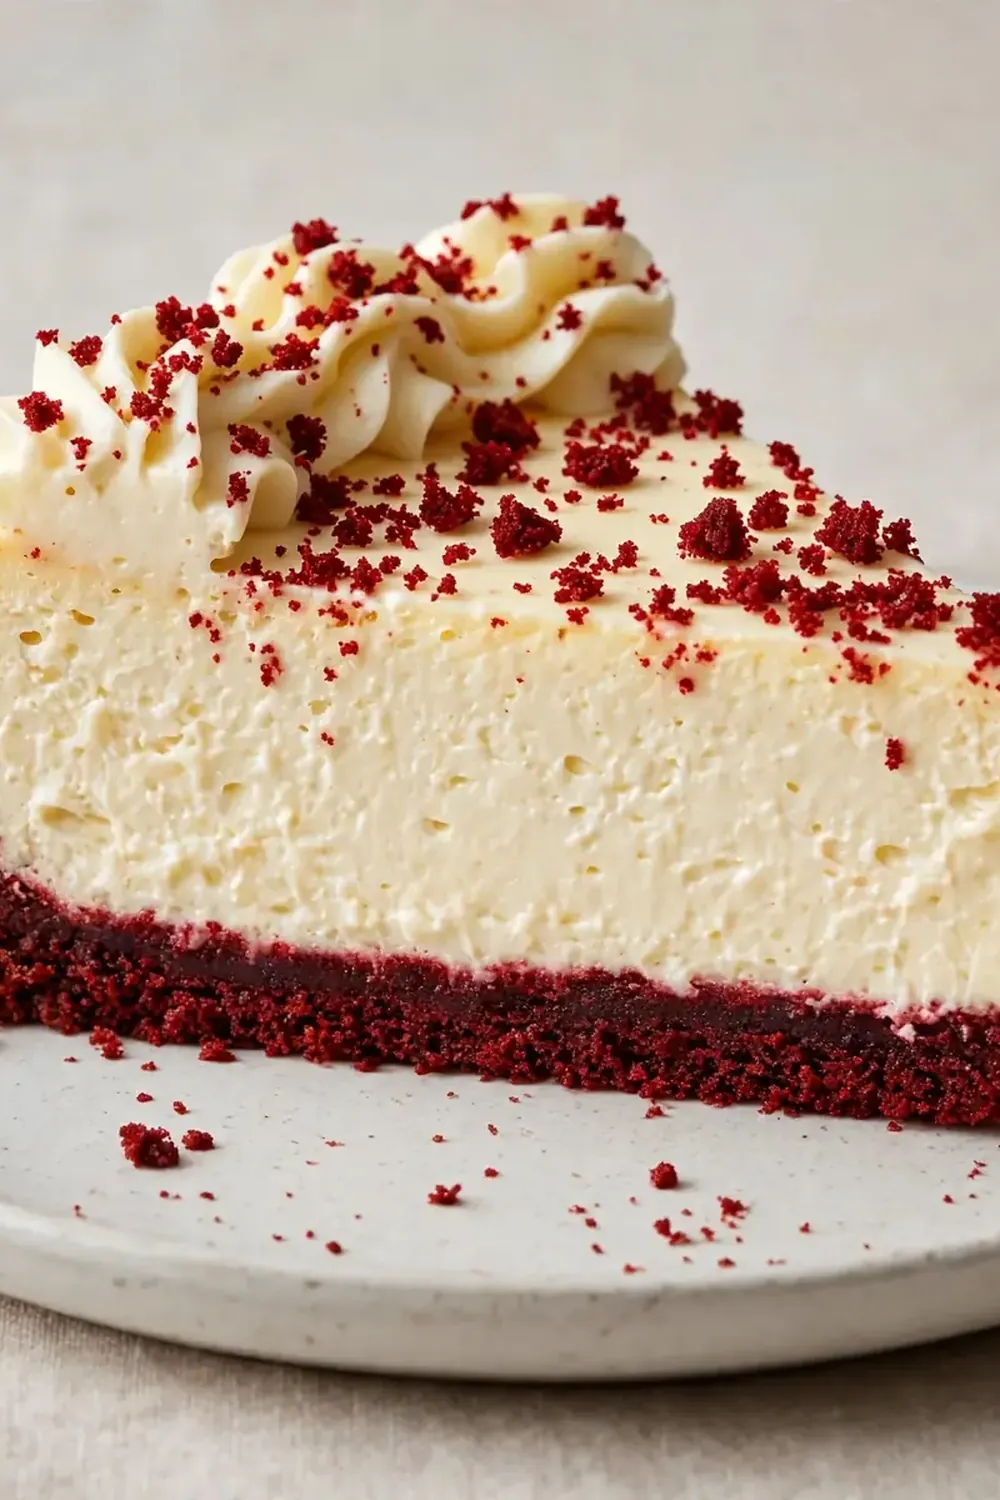
There’s a moment when the cheesecake is set, the red velvet layer has that deep, dark crimson contrast against the snowy topping, and you realise this isn’t just a dessert; it’s the centrepiece of the evening. After testing this recipe five times, I finally got it just right, and I’m sharing every detail so you can serve a slice that looks like it came from a high-end patisserie, not your home kitchen.
Recipe Overview
- Prep Time: 45 minutes
- Cook Time: 1 hour 10 minutes
- Chilling Time: 6 hours (or overnight)
- Total Time: 8 hours
- Servings: 12 generous slices
- Difficulty: Medium
Why You’ll Love This Classic Red Velvet Cheesecake
- Restaurant-quality presentation: The clean, sharp slices and glossy finish make it an instant showstopper on any table.
- Two iconic desserts in one: You get the tangy, moist crumb of red velvet cake fused with the silky, rich texture of a classic cheesecake.
- Perfect make-ahead dessert: Because it needs several hours to chill, you can prepare it the day before your dinner party, freeing you up to enjoy your guests.
- Customisable topping: The cream cheese frosting can be piped into elegant rosettes or spread into a flawless, mirror-smooth surface.
- Balanced sweetness: The slight tang from the buttermilk and cream cheese cuts through the sugar, so each bite feels indulgent but never cloying.
Ingredients You’ll Need
- 200g digestive biscuits
- 80g unsalted butter, melted
- 30g caster sugar
- 600g full-fat cream cheese, at room temperature
- 200g caster sugar (for the filling)
- 3 large eggs, at room temperature
- 1 tsp vanilla extract
- 150ml sour cream
- 2 tbsp red food colouring gel (not liquid, for a true vibrant colour)
- 1 tbsp cocoa powder
- 1 tsp white vinegar
- 150g plain flour
- 100ml buttermilk
- ½ tsp bicarbonate of soda
- 300ml double cream
- 100g icing sugar
- 200g cream cheese (for the topping)
Tip: Ensure your cream cheese and eggs are truly at room temperature. If they are cold, the batter will look lumpy and the cheesecake may crack as it bakes.
How to Make Classic Red Velvet Cheesecake
- Prepare the crust: Crush the digestive biscuits into fine crumbs. I like to put them in a sealed bag and bash them with a rolling pin until no large pieces remain. Mix the crumbs with the melted butter and 30g caster sugar. Press this mixture firmly into the base of a 23cm springform tin lined with parchment paper. The crumbs should feel compact and hold together when pressed. Bake at 160°C (fan) for 10 minutes, until you can smell a toasty biscuit aroma. Set aside to cool completely.
- Make the red velvet batter: In a large bowl, whisk the 600g cream cheese until it is smooth and looks glossy, with no lumps. Add the 200g caster sugar and beat until the mixture feels light and fluffy. Add the eggs one at a time, beating well after each addition. The batter should look pale and silky. In a separate bowl, mix the sour cream, vanilla extract, red food colouring gel, cocoa powder, and white vinegar. The colour should be a deep, dark red. Fold this into the cream cheese mixture gently – you want the batter to be uniformly red, with no white streaks.
- Combine the flour and buttermilk: Sift the plain flour and bicarbonate of soda together. Fold half the flour mixture into the red batter, then half the buttermilk. Repeat with the remaining flour and buttermilk. Mix until just combined. The batter will be thick, velvety, and a striking shade of crimson. Pour this over the cooled biscuit base.
- Bake the cheesecake: Place the springform tin on a baking tray. Pour boiling water into the tray until it comes halfway up the sides of the tin – this water bath prevents cracking. Bake at 160°C (fan) for 55–65 minutes. The edges will be set and lightly puffed, but the centre should wobble like a set jelly when you gently shake the tin. Turn off the oven, crack the door open, and let the cheesecake cool inside for one hour. This gentle cooling stops a dramatic crack from forming.
- Chill the cheesecake: Remove the cheesecake from the oven and let it reach room temperature on the counter. The surface should feel firm to the touch. Then, cover the tin with cling film and refrigerate for at least 6 hours, preferably overnight. The texture will become dense and creamy.
- Make the cream cheese topping: Whip the double cream with the icing sugar until soft peaks form. In a separate bowl, beat the remaining 200g cream cheese until smooth. Gently fold the whipped cream into the cream cheese until you have a light, fluffy frosting that holds its shape. The colour should be pure white, contrasting beautifully with the red cake.
- Assemble and present: Run a hot knife around the edge of the tin before removing the springform ring. Spread or pipe the topping over the chilled cheesecake. For a restaurant-style finish, use a palette knife to create smooth swirls. Chill for another 30 minutes before slicing. When you cut, wipe the knife clean between each slice for immaculate edges.
Tips From My Kitchen
- Use gel food colouring: Liquid colouring is too watery and can throw off the batter’s consistency. Gel gives that intense, dramatic red without altering the texture. You’ll know you’ve added enough when the batter looks almost black-red before baking.
- Don’t skip the water bath: The steam created by the hot water keeps the oven humid, which prevents the top of the cheesecake from drying out and cracking. I used to struggle with this dish until I discovered this technique; my cheesecakes used to split every time.
- Room temperature ingredients are non-negotiable: Cold cream cheese creates a lumpy batter that won’t bake evenly. If you forget to take it out early, cut the cream cheese into cubes and microwave it in 10-second bursts until it feels soft to the touch.
- Wipe your knife between cuts: For that clean, professional slice, run your knife under hot water, dry it, and slice. Wipe the blade clean after each cut. This prevents the red crumbs from smearing into the white topping.
- Let it rest before serving: After you add the topping and chill it, let the cheesecake sit at room temperature for 15 minutes before serving. This softens the texture just enough to taste the creamy richness fully.
Equipment You’ll Need
- Stand mixer or hand mixer
- 23cm springform cake tin
- Baking tray (large enough for the water bath)
- Parchment paper
- Wire cooling rack
- Palette knife
- Rolling pin (for crushing biscuits)
- Large mixing bowls
Common Mistakes to Avoid
- Overmixing the batter: Once you add the flour, mix only until it disappears. Overmixing develops the gluten, making the cake layer dense and tough instead of tender. You’ll know you’ve mixed enough when the batter is just uniform in colour.
- Wrong temperature: Baking at too high a temperature will cause the cheesecake to puff up and then collapse, leaving a large crack. Keep the oven at 160°C (fan) and use an oven thermometer if yours runs hot. The centre should wobble, not be completely firm.
- Skipping the rest time: Cutting into the cheesecake while it’s still warm will result in a messy, gooey slice. The chilling time allows the structure to set fully, giving you that clean, satisfying slice. Patience is essential here.
Delicious Variations to Try
- White Chocolate Drizzle: Melt 100g of good white chocolate with 50ml of double cream and drizzle it over the finished cheesecake. The white chocolate adds a sweet, creamy contrast to the tangy red velvet.
- Vegetarian/Vegan Option: Use a plant-based cream cheese and a vegan butter block for the crust. Replace the eggs with a mixture of one tablespoon of ground flaxseed mixed with three tablespoons of water per egg. The texture will be slightly denser but still delicious.
- Different Protein: For a savoury twist that works as a starter, swap the red velvet layer for a beetroot and goat’s cheese mixture. This is not a common approach, but it makes for a stunning pink and white striped cheesecake for a dinner party.
What to Serve With Classic Red Velvet Cheesecake
- A handful of fresh raspberries or strawberries, which cut through the richness with their tartness.
- A dusting of icing sugar and a few chocolate curls for an elegant, textured finish.
- A small cup of strong black coffee or an espresso to balance the sweetness.
- A dollop of lightly whipped cream on the side for extra indulgence.
Still hungry for ideas? You might also love Christmas Red Velvet Cheesecake Recipe, Cheesecake Factory Red Velvet Cheesecake Copycat from our sister kitchens.
Frequently Asked Questions
Classic Red Velvet Cheesecake
Ingredients
Method
-
Prepare the crust: Crush the digestive biscuits into fine crumbs. I like to put them in a sealed bag and bash them with a rolling pin until no large pieces remain. Mix the crumbs with the melted butter and 30g caster sugar. Press this mixture firmly into the base of a 23cm springform tin lined with parchment paper. The crumbs should feel compact and hold together when pressed. Bake at 160°C (fan) for 10 minutes, until you can smell a toasty biscuit aroma. Set aside to cool completely.
-
Make the red velvet batter: In a large bowl, whisk the 600g cream cheese until it is smooth and looks glossy, with no lumps. Add the 200g caster sugar and beat until the mixture feels light and fluffy. Add the eggs one at a time, beating well after each addition. The batter should look pale and silky. In a separate bowl, mix the sour cream, vanilla extract, red food colouring gel, cocoa powder, and white vinegar. The colour should be a deep, dark red. Fold this into the cream cheese mixture gently – you want the batter to be uniformly red, with no white streaks.
-
Combine the flour and buttermilk: Sift the plain flour and bicarbonate of soda together. Fold half the flour mixture into the red batter, then half the buttermilk. Repeat with the remaining flour and buttermilk. Mix until just combined. The batter will be thick, velvety, and a striking shade of crimson. Pour this over the cooled biscuit base.
-
Bake the cheesecake: Place the springform tin on a baking tray. Pour boiling water into the tray until it comes halfway up the sides of the tin – this water bath prevents cracking. Bake at 160°C (fan) for 55–65 minutes. The edges will be set and lightly puffed, but the centre should wobble like a set jelly when you gently shake the tin. Turn off the oven, crack the door open, and let the cheesecake cool inside for one hour. This gentle cooling stops a dramatic crack from forming.
-
Chill the cheesecake: Remove the cheesecake from the oven and let it reach room temperature on the counter. The surface should feel firm to the touch. Then, cover the tin with cling film and refrigerate for at least 6 hours, preferably overnight. The texture will become dense and creamy.
-
Make the cream cheese topping: Whip the double cream with the icing sugar until soft peaks form. In a separate bowl, beat the remaining 200g cream cheese until smooth. Gently fold the whipped cream into the cream cheese until you have a light, fluffy frosting that holds its shape. The colour should be pure white, contrasting beautifully with the red cake.
-
Assemble and present: Run a hot knife around the edge of the tin before removing the springform ring. Spread or pipe the topping over the chilled cheesecake. For a restaurant-style finish, use a palette knife to create smooth swirls. Chill for another 30 minutes before slicing. When you cut, wipe the knife clean between each slice for immaculate edges.
Notes
This cheesecake has become my signature dish for dinner parties, and I’d love to hear how yours turns out. Drop a comment below to let me know if you tried the piping technique or if you added your own decorative twist. For more showstopping desserts, check out our All Recipes page, and if you need a no-bake option for a last-minute gathering, try our No Bake Chocolate Trifle With Whipped Cream. Happy baking!