Classic Red Velvet Cake With Cream Cheese Frosting
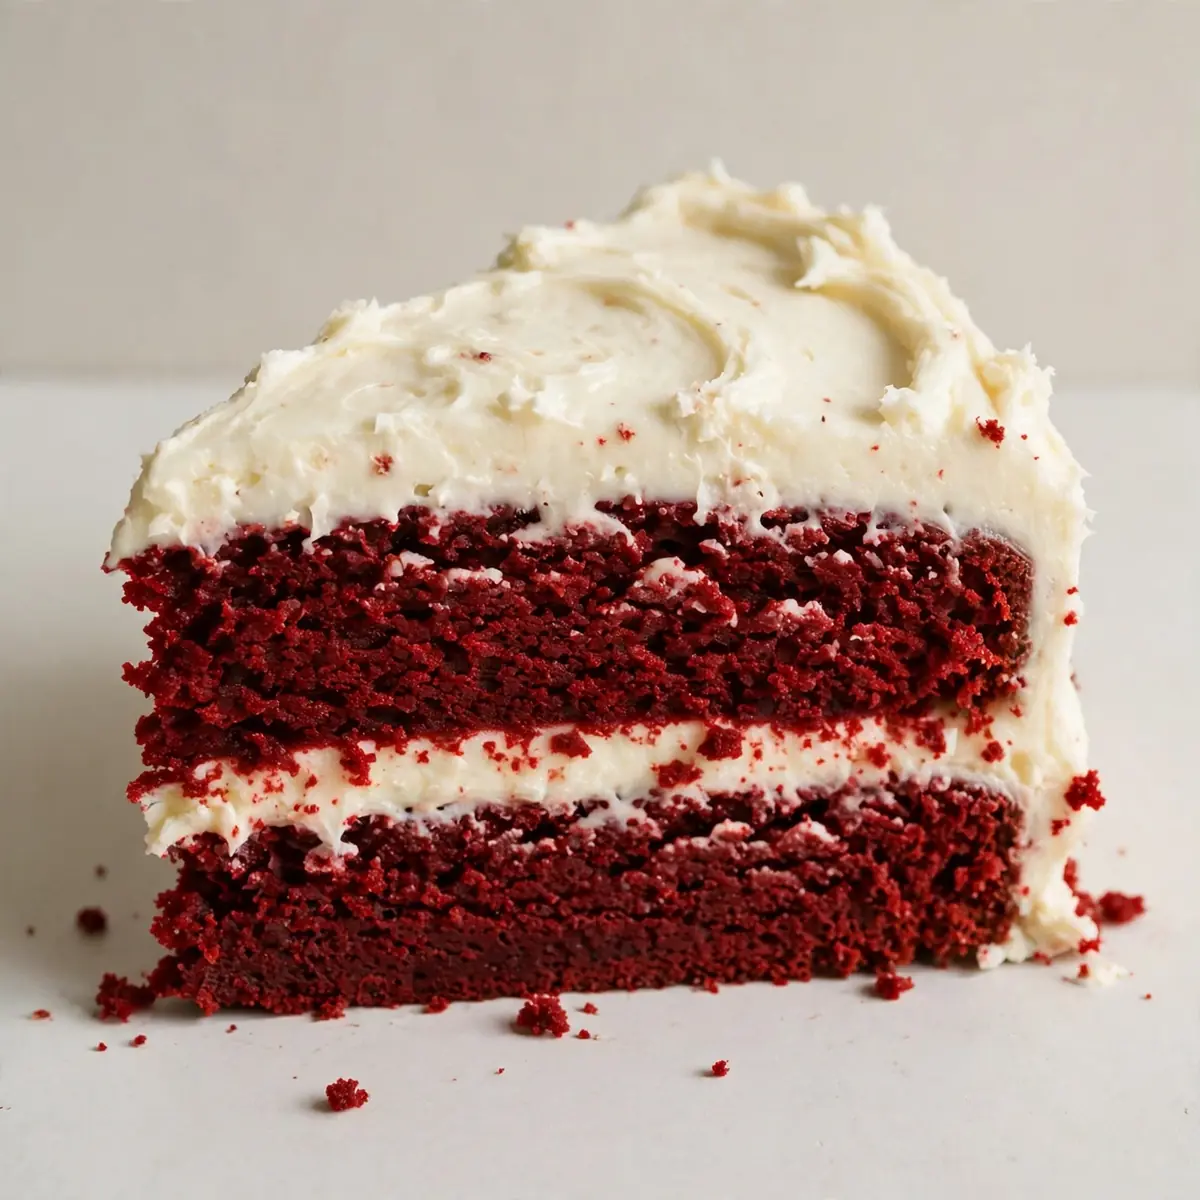
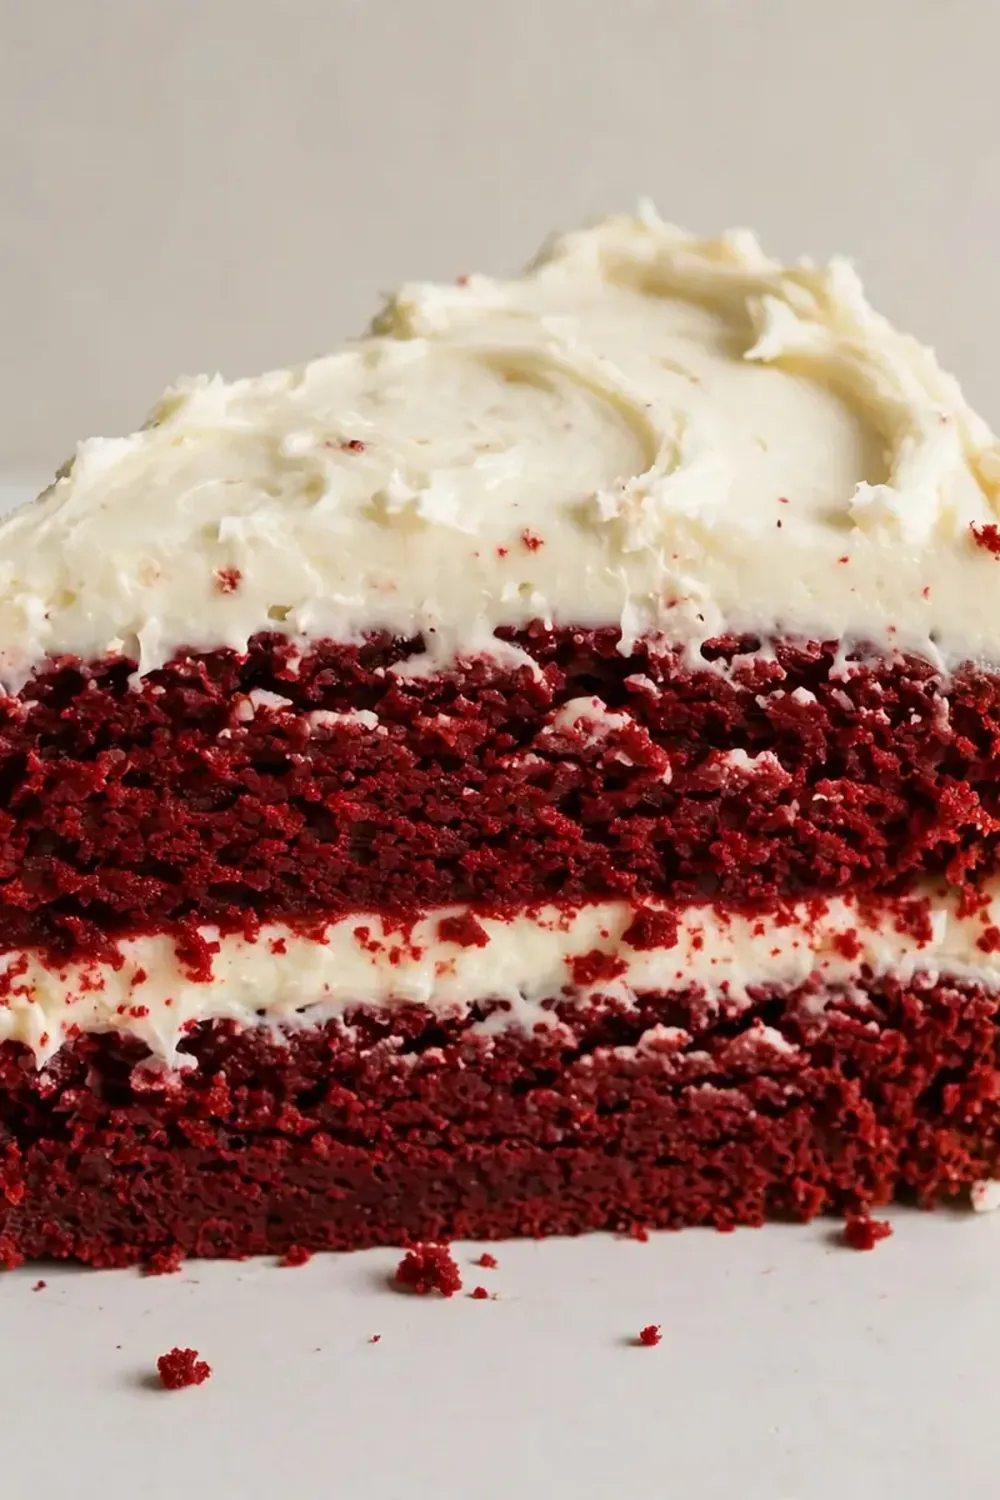
There’s a quiet confidence in presenting a dessert that looks like it belongs on a silver tray in a hushed dining room, yet tastes like the finest homemade indulgence. This Classic Red Velvet Cake with Cream Cheese Frosting is that dish for me—a showstopper that arrives at the table with deep crimson layers, a snow-white swirl of frosting, and the kind of tender crumb that makes guests pause mid-conversation. Let’s get straight to building this restaurant-quality centrepiece.
Recipe Overview
- Prep Time: 25 minutes
- Cook Time: 30-35 minutes
- Total Time: 1 hour 5 minutes (plus cooling time)
- Servings: 12 generous slices
- Difficulty: Medium
Why You’ll Love This Classic Red Velvet Cake with Cream Cheese Frosting
- Restaurant-worthy presentation: The stark contrast of deep red sponge against pristine white frosting makes for an unforgettable visual on any table.
- Perfectly balanced flavour: A subtle hint of cocoa and tangy buttermilk create a sophisticated base that isn’t overly sweet, letting the creamy frosting shine.
- Unfussy elegance: Despite its grand appearance, this cake comes together with straightforward techniques that any home baker can master.
- Make-ahead magic: The cake layers freeze beautifully, and the frosting can be prepared a day in advance, giving you time to focus on plating details.
- My kids absolutely devour this every time I make it: Even the little ones recognise this as something special, and I love watching their faces light up when I bring it out.
Ingredients You’ll Need
- 300g plain flour
- 30g cocoa powder (Dutch-processed for a deeper colour)
- 1½ teaspoons bicarbonate of soda
- ½ teaspoon fine sea salt
- 250ml buttermilk, at room temperature
- 1 tablespoon white vinegar
- 1 teaspoon vanilla extract
- 1 tablespoon red gel food colouring (or 2 tablespoons liquid)
- 225g unsalted butter, softened
- 300g caster sugar
- 2 large eggs, at room temperature
- For the Cream Cheese Frosting:
- 450g full-fat cream cheese, softened
- 225g unsalted butter, softened
- 500g icing sugar, sifted
- 2 teaspoons vanilla extract
Tip: Room temperature ingredients are non-negotiable here. Cold cream cheese will leave you with a lumpy frosting, and cold butter won’t cream properly with the sugar, affecting the cake’s texture.
How to Make Classic Red Velvet Cake with Cream Cheese Frosting
- Preheat and prepare your tins. Set your oven to 175°C (350°F) with a rack in the centre. Grease two 20cm round cake tins and line the bases with parchment paper. The paper should sit flush against the bottom—any wrinkles will mark your cake.
- Whisk the dry ingredients together. In a large bowl, combine the flour, cocoa powder, bicarbonate of soda, and salt. Whisk them thoroughly until the cocoa has evenly dispersed and the mixture looks a uniform pale brown. Sift if you want extra assurance against lumps.
- Mix the wet ingredients. In a jug, stir together the buttermilk, vinegar, vanilla extract, and red food colouring. The mixture will turn a vibrant ruby shade, and you’ll notice a slight fizz from the vinegar reacting with the buttermilk—this is exactly what you want.
- Cream the butter and sugar. In the bowl of a stand mixer fitted with the paddle attachment, beat the softened butter and caster sugar on medium speed for 3-4 minutes. You’re looking for a pale, fluffy mixture that looks like whipped cream and smells sweetly of butter. Scrape down the sides halfway through.
- Add the eggs one at a time. Beat in each egg until fully incorporated before adding the next. The mixture should look glossy and smooth, with no signs of separation. If it looks curdled, your eggs were too cold—don’t panic, it will come together in the next step.
- Alternate the dry and wet ingredients. With the mixer on low speed, add one-third of the flour mixture, then half of the buttermilk mixture, mixing until just combined after each addition. Repeat, ending with the final third of flour. Stop the mixer the moment the last streak of flour disappears—overmixing will make the cake tough. The batter should be thick, silky, and a deep crimson colour.
- Bake until springy. Divide the batter evenly between the two tins and smooth the tops. Bake for 30-35 minutes. The cakes are done when a skewer inserted into the centre comes out clean or with a few moist crumbs, and the tops spring back when gently pressed. You’ll smell a faint, warm cocoa aroma filling your kitchen.
- Cool completely. Leave the cakes in their tins on a wire rack for 10 minutes, then turn them out onto the rack to cool completely. Do not attempt to frost them while they’re even slightly warm, or the cream cheese frosting will slide right off. The layers should feel cool to the touch all the way through.
- Make the frosting. In a clean mixer bowl, beat the softened cream cheese and butter together on medium speed until smooth and lump-free—about 2 minutes. Reduce speed to low, add the sifted icing sugar in three batches, mixing until combined after each. Add the vanilla and beat on medium-high for 1 minute until the frosting is light, fluffy, and holds a firm peak. Taste it—it should be tangy and sweet in perfect balance.
- Assemble and plate. Place one layer on a serving plate or cake stand. Spread a generous layer of frosting (about 1cm thick) right to the edge. Top with the second layer, bottom-side up for a flat surface. Apply a thin crumb coat all over the cake and refrigerate for 20 minutes. Then, apply a final, thick layer of frosting, using a palette knife to create smooth sides or decorative swirls. Chill for at least 30 minutes before slicing for clean, sharp edges.
Tips From My Kitchen
- Weigh your flour accurately. Scooping flour directly from the bag can pack in up to 50g more than intended, throwing off the cake’s moisture balance. Use a digital scale for precision—your crumb will be tender, not dense.
- Use gel food colouring, not liquid. Liquid colouring adds extra water that can thin the batter and affect the texture. Gel colouring gives you that intense, vibrant red without altering the consistency. I stumbled upon this combination by accident, and it’s been a hit ever since.
- Don’t skip the crumb coat. That thin first layer of frosting seals in any loose crumbs and creates a pristine base for your final coat. It takes an extra 20 minutes in the fridge, but the difference in presentation is night and day—no speckled crumbs ruining your white frosting.
- Slice with a hot, dry knife. Dip a long, serrated knife into hot water, wipe it completely dry, then slice. The heat glides through the cold frosting and cake without dragging or smearing. Wipe and reheat between each slice for perfect portions.
- Chill the cake before serving. A fully assembled cake needs at least 30 minutes in the fridge after frosting. This firms up the cream cheese frosting so it cuts cleanly and holds its shape on the plate, just like at a high-end restaurant.
Equipment You’ll Need
- Stand mixer or hand mixer
- Two 20cm round cake tins
- Parchment paper
- Wire cooling rack
- Digital kitchen scales
- Palette knife for frosting
- Serrated knife for slicing
Common Mistakes to Avoid
- Overmixing the batter: Once you add the flour, gluten develops quickly. Overmixing leads to a dense, rubbery cake rather than a tender crumb. Mix only until the flour disappears, then stop immediately.
- Wrong temperature for frosting: If your cream cheese or butter is too cold, you’ll end up with a lumpy, grainy frosting. If they’re too warm, the frosting will be runny and slide off the cake. Both should be at a cool room temperature—around 20°C—so they beat into a smooth, spreadable consistency.
- Skipping the rest time after frosting: A freshly frosted cake needs time in the fridge for the frosting to set. Without this rest, your first slice will be a messy affair with frosting squishing out the sides. Patience here pays off in presentation.
Delicious Variations to Try
- Spicy Version: Add ½ teaspoon of cayenne pepper and 1 teaspoon of ground cinnamon to the dry ingredients. The gentle warmth complements the cocoa and cuts through the sweet frosting beautifully, adding an unexpected layer of complexity.
- Vegan Option: Replace the butter with a high-quality block margarine and the eggs with flax eggs (2 tablespoons ground flaxseed mixed with 6 tablespoons water, left to gel for 10 minutes). Use a plant-based cream cheese for the frosting. The texture will be slightly denser but still deliciously moist.
- Different Protein: For a savoury-sweet twist, fold 100g of finely chopped toasted pecans or walnuts into the batter before baking. They add a nutty crunch that contrasts beautifully with the soft crumb and creamy frosting.
What to Serve With Classic Red Velvet Cake with Cream Cheese Frosting
- A small dollop of lightly whipped double cream on the side adds a touch of luxury.
- Fresh raspberries or sliced strawberries provide a tart contrast that cuts through the sweetness.
- A dusting of cocoa powder or a few edible flowers on the plate elevates the presentation instantly.
- Pair with a glass of cold milk or a Rose Lemonade Mocktail for a refreshing balance.
Still hungry for ideas? You might also love Black Velvet Halloween Cake, High Protein Smoked Salmon And Cream Cheese Bagel from our sister kitchens.
Frequently Asked Questions
Classic Red Velvet Cake with Cream Cheese Frosting
Ingredients
Method
- Preheat and prepare your tins. Set your oven to 175°C (350°F) with a rack in the centre. Grease two 20cm round cake tins and line the bases with parchment paper. The paper should sit flush against the bottom—any wrinkles will mark your cake.
- Whisk the dry ingredients together. In a large bowl, combine the flour, cocoa powder, bicarbonate of soda, and salt. Whisk them thoroughly until the cocoa has evenly dispersed and the mixture looks a uniform pale brown. Sift if you want extra assurance against lumps.
- Mix the wet ingredients. In a jug, stir together the buttermilk, vinegar, vanilla extract, and red food colouring. The mixture will turn a vibrant ruby shade, and you'll notice a slight fizz from the vinegar reacting with the buttermilk—this is exactly what you want.
- Cream the butter and sugar. In the bowl of a stand mixer fitted with the paddle attachment, beat the softened butter and caster sugar on medium speed for 3-4 minutes. You're looking for a pale, fluffy mixture that looks like whipped cream and smells sweetly of butter. Scrape down the sides halfway through.
- Add the eggs one at a time. Beat in each egg until fully incorporated before adding the next. The mixture should look glossy and smooth, with no signs of separation. If it looks curdled, your eggs were too cold—don't panic, it will come together in the next step.
- Alternate the dry and wet ingredients. With the mixer on low speed, add one-third of the flour mixture, then half of the buttermilk mixture, mixing until just combined after each addition. Repeat, ending with the final third of flour. Stop the mixer the moment the last streak of flour disappears—overmixing will make the cake tough. The batter should be thick, silky, and a deep crimson colour.
- Bake until springy. Divide the batter evenly between the two tins and smooth the tops. Bake for 30-35 minutes. The cakes are done when a skewer inserted into the centre comes out clean or with a few moist crumbs, and the tops spring back when gently pressed. You'll smell a faint, warm cocoa aroma filling your kitchen.
- Cool completely. Leave the cakes in their tins on a wire rack for 10 minutes, then turn them out onto the rack to cool completely. Do not attempt to frost them while they're even slightly warm, or the cream cheese frosting will slide right off. The layers should feel cool to the touch all the way through.
- Make the frosting. In a clean mixer bowl, beat the softened cream cheese and butter together on medium speed until smooth and lump-free—about 2 minutes. Reduce speed to low, add the sifted icing sugar in three batches, mixing until combined after each. Add the vanilla and beat on medium-high for 1 minute until the frosting is light, fluffy, and holds a firm peak. Taste it—it should be tangy and sweet in perfect balance.
- Assemble and plate. Place one layer on a serving plate or cake stand. Spread a generous layer of frosting (about 1cm thick) right to the edge. Top with the second layer, bottom-side up for a flat surface. Apply a thin crumb coat all over the cake and refrigerate for 20 minutes. Then, apply a final, thick layer of frosting, using a palette knife to create smooth sides or decorative swirls. Chill for at least 30 minutes before slicing for clean, sharp edges.
Notes
I’d love to hear how this cake turned out for you—did you add any personal touches to the plating, or did you serve it with something unexpected? Drop a comment below and share your experience. For more stunning desserts that impress guests every time, browse our All Recipes page, or try our Classic Banana Pudding With Vanilla Wafers for another showstopping treat. Happy baking!