No-Bake Blueberry Cheesecake Bars
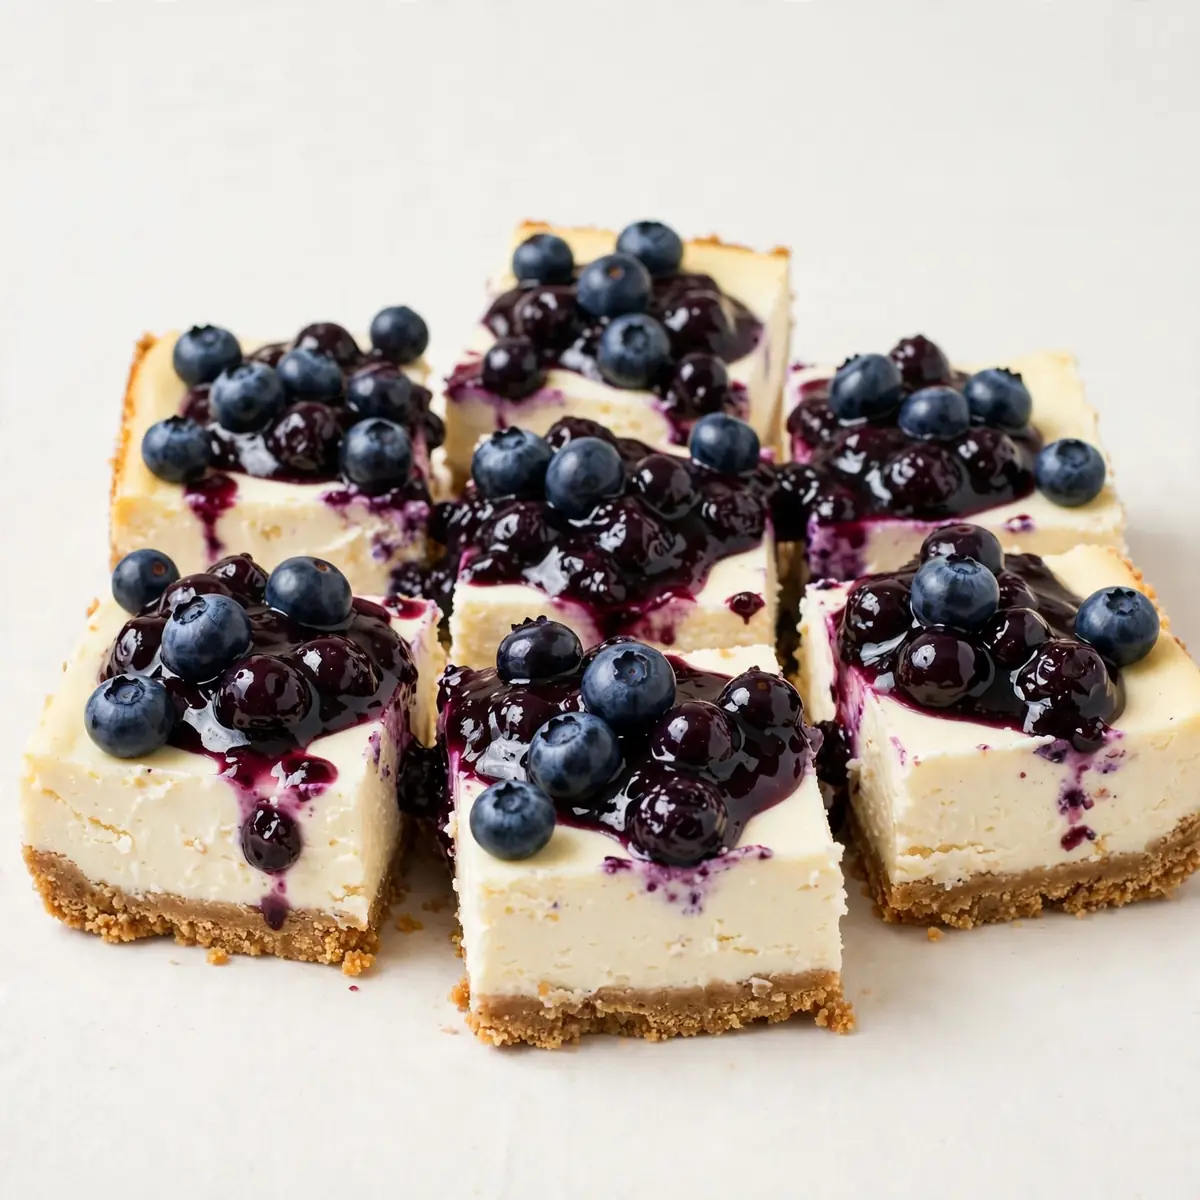
I remember the first time I served these No-Bake Blueberry Cheesecake Bars at a dinner party. I spent the entire morning fussing over a complicated roast, only for my guests to bypass the main course and hover around the dessert tray, asking for the recipe. It was the quiet, unassuming cheesecake bar—chilled, glossy, and studded with jewel-like berries—that stole the show. Since then, I’ve refined the presentation, swapping a simple square for a carefully plated slice with a swoosh of compote and a tiny sprig of mint, and it’s become my signature move for impressing guests without ever turning on the oven.
Recipe Overview
- Prep Time: 25 minutes
- Cook Time: 0 minutes (no-bake)
- Chill Time: 4 hours (minimum) to 8 hours (preferred)
- Total Time: 4 hours 25 minutes
- Servings: 12 generous squares
- Difficulty: Easy
Why You’ll Love This No-Bake Blueberry Cheesecake Bars
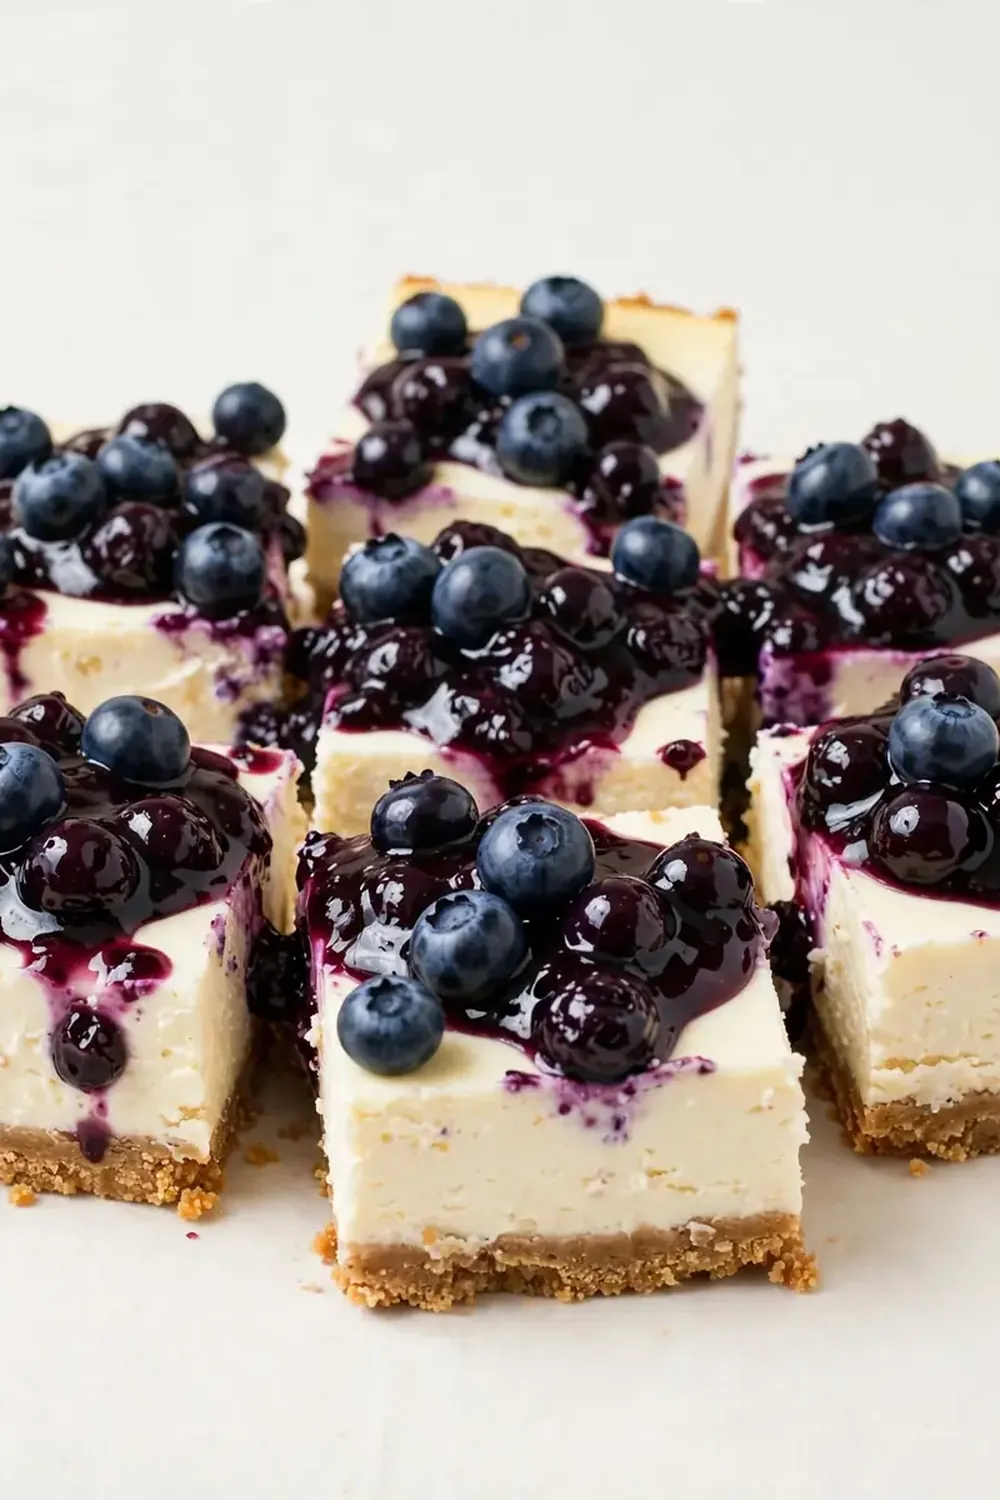
- Restaurant-Quality Presentation: With a clean, sharp cut and a vibrant blueberry swirl on top, these bars look like they came from a patisserie display case. The glossy finish and jewel-toned fruit give an air of sophistication that belies the simple method.
- No Oven Required: Perfect for warm weather or when you want to avoid heating up the kitchen. The entire dessert comes together on the hob and in the fridge, leaving you free to focus on the rest of your menu.
- Make-Ahead Hero: These bars actually improve after a full day in the fridge. The base firms up beautifully, and the flavours meld into a cohesive, creamy bite. You can prepare them up to two days in advance without any loss of quality.
- Balanced Sweetness: The tangy cream cheese filling cuts through the sweet biscuit base, while the blueberry layer provides a fresh, fruity acidity. It’s a dessert that satisfies a sweet tooth without cloying.
- Customisable for Dietary Needs: It’s simple to make gluten-free by swapping the digestive biscuits for a gluten-free alternative, and the filling can be made with a plant-based cream cheese for a vegetarian or vegan version that still sets perfectly.
Ingredients You’ll Need
- For the Base:
- 200g digestive biscuits (or shortbread biscuits)
- 100g unsalted butter, melted
- 1 tablespoon caster sugar
- Pinch of fine sea salt
- For the Blueberry Compote (Swirl & Topping):
- 250g fresh or frozen blueberries
- 60g caster sugar
- 1 tablespoon lemon juice (freshly squeezed)
- 1 teaspoon cornflour mixed with 2 teaspoons cold water (slurry)
- For the Cheesecake Filling:
- 500g full-fat cream cheese, at room temperature
- 150g caster sugar
- 2 teaspoons vanilla bean paste (or good-quality vanilla extract)
- 300ml double cream, cold
- Zest of 1 lemon (optional, but brightens the flavour)
- For Garnish (Recommended for Presentation):
- Fresh blueberries
- Small mint sprigs
- Edible flowers (optional, for a truly restaurant touch)
Tip: Ensure your cream cheese is genuinely at room temperature—leave it out for at least 30 minutes before you start. Cold cream cheese will create a lumpy filling that won’t set smoothly. Also, use a high-fat double cream (at least 48% butterfat) for the best structure; lighter creams won’t whip to stiff peaks and the bars will be softer.
How to Make No-Bake Blueberry Cheesecake Bars
- Prepare the Blueberry Compote: Place the blueberries, 60g of caster sugar, and lemon juice in a small saucepan over medium heat. Stir gently as the berries begin to soften and release their juices—you’ll hear a gentle popping sound as the skins burst, and the liquid will turn a deep, royal purple. Once the mixture is bubbling, cook for 5 minutes until it has thickened slightly. Stir in the cornflour slurry and cook for another 30 seconds, until the compote coats the back of a spoon and looks glossy. Remove from the heat and allow it to cool completely to room temperature. It will thicken further as it cools.
- Make the Biscuit Base: Place the digestive biscuits in a sealed plastic bag and crush them with a rolling pin until you have fine crumbs with a few small pebbles for texture—the mixture should look like wet sand when you’re done. Alternatively, pulse them in a food processor. Transfer the crumbs to a mixing bowl, pour in the melted butter, the 1 tablespoon of caster sugar, and the salt. Stir with a fork until every crumb is coated and the mixture clumps together when pressed between your fingers. The aroma of warm butter and biscuit is deeply comforting at this stage.
- Press the Base: Line a 20cm x 20cm square baking tin with baking parchment, leaving an overhang on two opposite sides to act as handles. Tip the crumb mixture into the tin and press it down firmly and evenly using the flat bottom of a measuring cup or a glass. The surface should be smooth and compacted, with no loose crumbs. Place the tin in the refrigerator to chill while you prepare the filling—this gives the butter a chance to set, preventing the base from crumbling when you cut the bars.
- Whip the Cream Cheese Filling: In a large bowl, beat the room-temperature cream cheese with the 150g of caster sugar and the vanilla bean paste using an electric hand mixer. Beat on medium speed for 2-3 minutes until the mixture is completely smooth, pale, and fluffy—there should be no lumps whatsoever. The texture will be thick and velvety. If using, fold in the lemon zest at this point.
- Fold in the Whipped Cream: In a separate clean bowl, whip the cold double cream until it holds stiff peaks—this takes about 3-4 minutes with an electric mixer. You’ll know it’s ready when you lift the beaters and the cream stands up in firm, unmoving peaks. The sound will change from a sloshing to a soft, dense thud. Take a large spoonful of the whipped cream and stir it into the cream cheese mixture to loosen it, then gently fold in the remaining whipped cream using a spatula. Fold until no white streaks remain; the final mixture should be airy, mousse-like, and very pale.
- Assemble the Layers: Remove the chilled tin from the fridge. Spoon half of the cheesecake filling onto the base and spread it into an even layer using an offset spatula. Drop small spoonfuls of the cooled blueberry compote (about half of it) over the filling, then drag a knife through the compote to create a marbled swirl effect. Repeat with the remaining filling, spreading it gently on top, then add the rest of the compote and swirl again. The top should look like an abstract painting—ribbons of deep purple against a creamy white canvas.
- Chill and Set: Gently tap the tin on the countertop to release any air bubbles. Cover the tin loosely with cling film and refrigerate for a minimum of 4 hours, but ideally 8 hours or overnight. The filling should feel firm to the touch and no longer jiggly when you gently shake the tin. The longer it sets, the cleaner your slices will be.
- Slice and Serve: Using the parchment overhang, lift the entire cheesecake block out of the tin and place it on a cutting board. For the cleanest slices, use a large, sharp chef’s knife and wipe it clean with a damp, hot cloth between each cut. Trim the edges first to reveal the pristine layers, then slice into 12 equal bars. Arrange each bar on a serving plate with a small dollop of extra compote, a few fresh blueberries, and a tiny mint sprig. This small touch makes all the difference when presenting to guests.
Tips From My Kitchen
- Room Temperature Ingredients Are Non-Negotiable: Cold cream cheese will not blend smoothly, leaving you with a grainy, lumpy filling that won’t set properly. Take it out of the fridge at least 30 minutes before you begin. If you’re short on time, cut the cream cheese into small cubes and let them sit on the counter for 15 minutes—it’s not ideal, but it works in a pinch.
- Use a Water Bath for the Compote: When simmering the blueberries, keep the heat at a gentle bubble, not a rolling boil. A rapid boil will break the berries down into a uniform mush, whereas a gentle simmer preserves some whole berries for a more interesting texture and a prettier swirl.
- Chill the Bowl and Beat for the Cream: For the stiffest whipped cream, pop your mixing bowl and beaters in the freezer for 10 minutes before you start. Cold equipment encourages the fat in the cream to stabilise faster, giving you a firmer, more voluminous whip that holds its shape beautifully in the cheesecake.
- Don’t Over-Whip the Cream: Stop the moment you see stiff peaks. If you keep going, the cream will split and turn into butter, which will ruin the light, mousse-like texture of your filling. The visual cue is when the cream pulls away from the sides of the bowl cleanly and stands up without drooping.
- Patience with Chilling: Four hours is the absolute minimum, but I always aim for eight. The longer the bars sit, the more the flavours marry and the structure sets. Cutting too early will result in a messy, soft slice that doesn’t hold its shape. Friends always ask me for this recipe after trying it at dinner parties, and I always tell them the secret is the overnight rest.
Common Mistakes to Avoid
- Overcrowding the Pan: If you try to double the recipe in the same tin, the bars will be too thick to set evenly, and the centre may remain soft and unstable. Always use the correct tin size (20cm x 20cm) and don’t be tempted to pile on extra filling. If you want more bars, make two separate batches.
- Wrong Temperature: The fridge should be set between 2°C and 4°C. If your fridge is too warm, the cheesecake won’t set properly and will feel mushy. Use a fridge thermometer to check, and place the tin on the coldest shelf (usually the bottom) rather than the door, where temperatures fluctuate.
- Skipping the Rest Time: I know it’s tempting to rush, but skipping the full chill time is the number one reason these bars fail. The cream cheese and cream need time to firm up. Cutting them after just two hours will give you a sloppy, unappetising mess. After testing this recipe five times, I finally got it just right—and the overnight rest was the turning point.
Delicious Variations to Try
- Spicy Version: Add ½ teaspoon of ground cardamom and a pinch of white pepper to the blueberry compote as it simmers. The floral, slightly peppery notes elevate the fruit and add a surprising warmth that pairs beautifully with the creamy cheesecake. Garnish with a tiny dusting of cinnamon.
- Vegetarian/Vegan Option: Use a high-quality vegan cream cheese and whipped coconut cream (chill a can of full-fat coconut milk overnight and scoop the solid cream). For the base, use vegan digestive biscuits and coconut oil instead of butter. The compote remains the same, making this a completely plant-based but equally decadent dessert.
- Different Berry: Swap the blueberries entirely for raspberries or blackberries. If using raspberries, reduce the sugar slightly as they are less tart. You can also try a mixed berry compote for a more complex flavour profile—just ensure you don’t overcook the softer berries like raspberries, which break down very quickly.
What to Serve With No-Bake Blueberry Cheesecake Bars
- A dollop of lightly sweetened crème fraîche to cut through the sweetness
- An espresso or a strong black coffee to balance the richness
- A chilled glass of Lavender Lemonade for a refreshing, floral contrast
- A light, crisp Drinks And Cocktails selection if you’re serving a full dinner party
li>A side of fresh, mixed berries tossed in a little lemon zest
Still hungry for ideas? You might also love Bake This Sweet Tart Cranberry Crumble Bars Recipe, Chocolate Cheesecake Cookie Bars A Decadent Treat from our sister kitchens.
Frequently Asked Questions
No-Bake Blueberry Cheesecake Bars
Ingredients
Method
- Prepare the Blueberry Compote: Place the blueberries, 60g of caster sugar, and lemon juice in a small saucepan over medium heat. Stir gently as the berries begin to soften and release their juices—you’ll hear a gentle popping sound as the skins burst, and the liquid will turn a deep, royal purple. Once the mixture is bubbling, cook for 5 minutes until it has thickened slightly. Stir in the cornflour slurry and cook for another 30 seconds, until the compote coats the back of a spoon and looks glossy. Remove from the heat and allow it to cool completely to room temperature. It will thicken further as it cools.
- Make the Biscuit Base: Place the digestive biscuits in a sealed plastic bag and crush them with a rolling pin until you have fine crumbs with a few small pebbles for texture—the mixture should look like wet sand when you’re done. Alternatively, pulse them in a food processor. Transfer the crumbs to a mixing bowl, pour in the melted butter, the 1 tablespoon of caster sugar, and the salt. Stir with a fork until every crumb is coated and the mixture clumps together when pressed between your fingers. The aroma of warm butter and biscuit is deeply comforting at this stage.
- Press the Base: Line a 20cm x 20cm square baking tin with baking parchment, leaving an overhang on two opposite sides to act as handles. Tip the crumb mixture into the tin and press it down firmly and evenly using the flat bottom of a measuring cup or a glass. The surface should be smooth and compacted, with no loose crumbs. Place the tin in the refrigerator to chill while you prepare the filling—this gives the butter a chance to set, preventing the base from crumbling when you cut the bars.
- Whip the Cream Cheese Filling: In a large bowl, beat the room-temperature cream cheese with the 150g of caster sugar and the vanilla bean paste using an electric hand mixer. Beat on medium speed for 2-3 minutes until the mixture is completely smooth, pale, and fluffy—there should be no lumps whatsoever. The texture will be thick and velvety. If using, fold in the lemon zest at this point.
- Fold in the Whipped Cream: In a separate clean bowl, whip the cold double cream until it holds stiff peaks—this takes about 3-4 minutes with an electric mixer. You’ll know it’s ready when you lift the beaters and the cream stands up in firm, unmoving peaks. The sound will change from a sloshing to a soft, dense thud. Take a large spoonful of the whipped cream and stir it into the cream cheese mixture to loosen it, then gently fold in the remaining whipped cream using a spatula. Fold until no white streaks remain; the final mixture should be airy, mousse-like, and very pale.
- Assemble the Layers: Remove the chilled tin from the fridge. Spoon half of the cheesecake filling onto the base and spread it into an even layer using an offset spatula. Drop small spoonfuls of the cooled blueberry compote (about half of it) over the filling, then drag a knife through the compote to create a marbled swirl effect. Repeat with the remaining filling, spreading it gently on top, then add the rest of the compote and swirl again. The top should look like an abstract painting—ribbons of deep purple against a creamy white canvas.
- Chill and Set: Gently tap the tin on the countertop to release any air bubbles. Cover the tin loosely with cling film and refrigerate for a minimum of 4 hours, but ideally 8 hours or overnight. The filling should feel firm to the touch and no longer jiggly when you gently shake the tin. The longer it sets, the cleaner your slices will be.
- Slice and Serve: Using the parchment overhang, lift the entire cheesecake block out of the tin and place it on a cutting board. For the cleanest slices, use a large, sharp chef’s knife and wipe it clean with a damp, hot cloth between each cut. Trim the edges first to reveal the pristine layers, then slice into 12 equal bars. Arrange each bar on a serving plate with a small dollop of extra compote, a few fresh blueberries, and a tiny mint sprig. This small touch makes all the difference when presenting to guests.
Notes
I’d love to hear how you plate these bars for your own guests—do you add a drizzle of extra compote, a dusting of icing sugar, or perhaps a few edible flowers? Drop your thoughts and any twists you’ve tried in the comments below. If you’re in the mood for another chilled, make-ahead dessert, you might also enjoy our Classic Homemade Vanilla Pudding or the ever-popular Classic Banana Pudding With Vanilla Wafers. Happy baking—or, in this case, happy chilling!